 ramblz
 progrz
 thangz
 fotoz
fotozArkham Horror LCG - A Gangster's Repentance #1 - Pit of Despair
Introduction
This will be a documented playthrough of The Innsmouth Conspiracy with Michael McGlen and Father Mateo. I’ve been wanting to do something like this for a while and DerBK’s The Drowned City playthrough was the inspiration I needed to get started.
The main focus will be on the gameplay but I want to try and sprinkle in some flavor where possible, as one of my favourite aspects of Arkham is the emergent storytelling. While I have played The Innsmouth Conspiracy once before, it’s been a while and I will try to play as if it’s my first time, because it is the first time for the investigators!
Deckbuilding
To spice things up, in the same vein as DerBK’s playthrough I will use certain deckbuilding restrictions. The only investigator packs available to each investigator will be:
- Core set.
- Starter investigator sets (Stella, Winifred, Jacqueline, Harvey, Nathaniel).
- Campaign’s investigator set.
- Investigator’s own set.
In our case, this means since we’re playing through The Innsmouth Conspiracy, both investigators have access to Core set, starter sets, and Innsmouth sets. Michael McGlen then has The Drowned City, and Father Mateo has The Forgotten Age. This seems like a great compromise between restricting options for more interesting deckbuilding decisions, and maintaining theme and synergy by sticking with cards specifically designed with the current investigator/campaign in mind. It also means the card pool will rotate a lot depending on any given campaign runthrough.
I will use the latest tabboo (2024-10-23).
I’ll be two-handing this playthrough, and have been keen to try out
[Michael McGlen]
 from The Drowned City. He’s very much focused on one thing and one thing only, guns, which means we need a strong cluever to progress the act deck. A strong seeker could work, but I’ve always had a fondness for
[Father Mateo]
from The Drowned City. He’s very much focused on one thing and one thing only, guns, which means we need a strong cluever to progress the act deck. A strong seeker could work, but I’ve always had a fondness for
[Father Mateo]
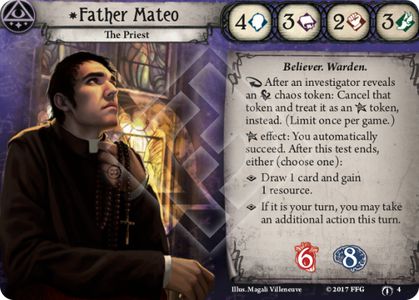
 as his theming is very evocative in the world of Arkham, and his ability very strong but limited.
Storytelling wise, there’s a lot of possibities with the two as well. Michael McGlen is hired to look into a disappearance in Innsmouth because of his firepower and knowledge of the backstreets. Father Mateo has a history investigating occult happenings which he sees as an affront to his faith. The two meet on the job, and initially could not be more ideologically opposed, but over time they will come to understand each other and perhaps an unlikely friendship will form…
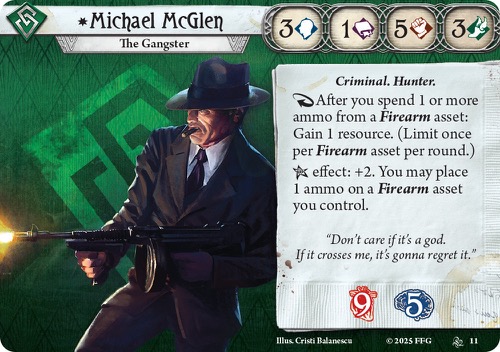
Michael McGlen
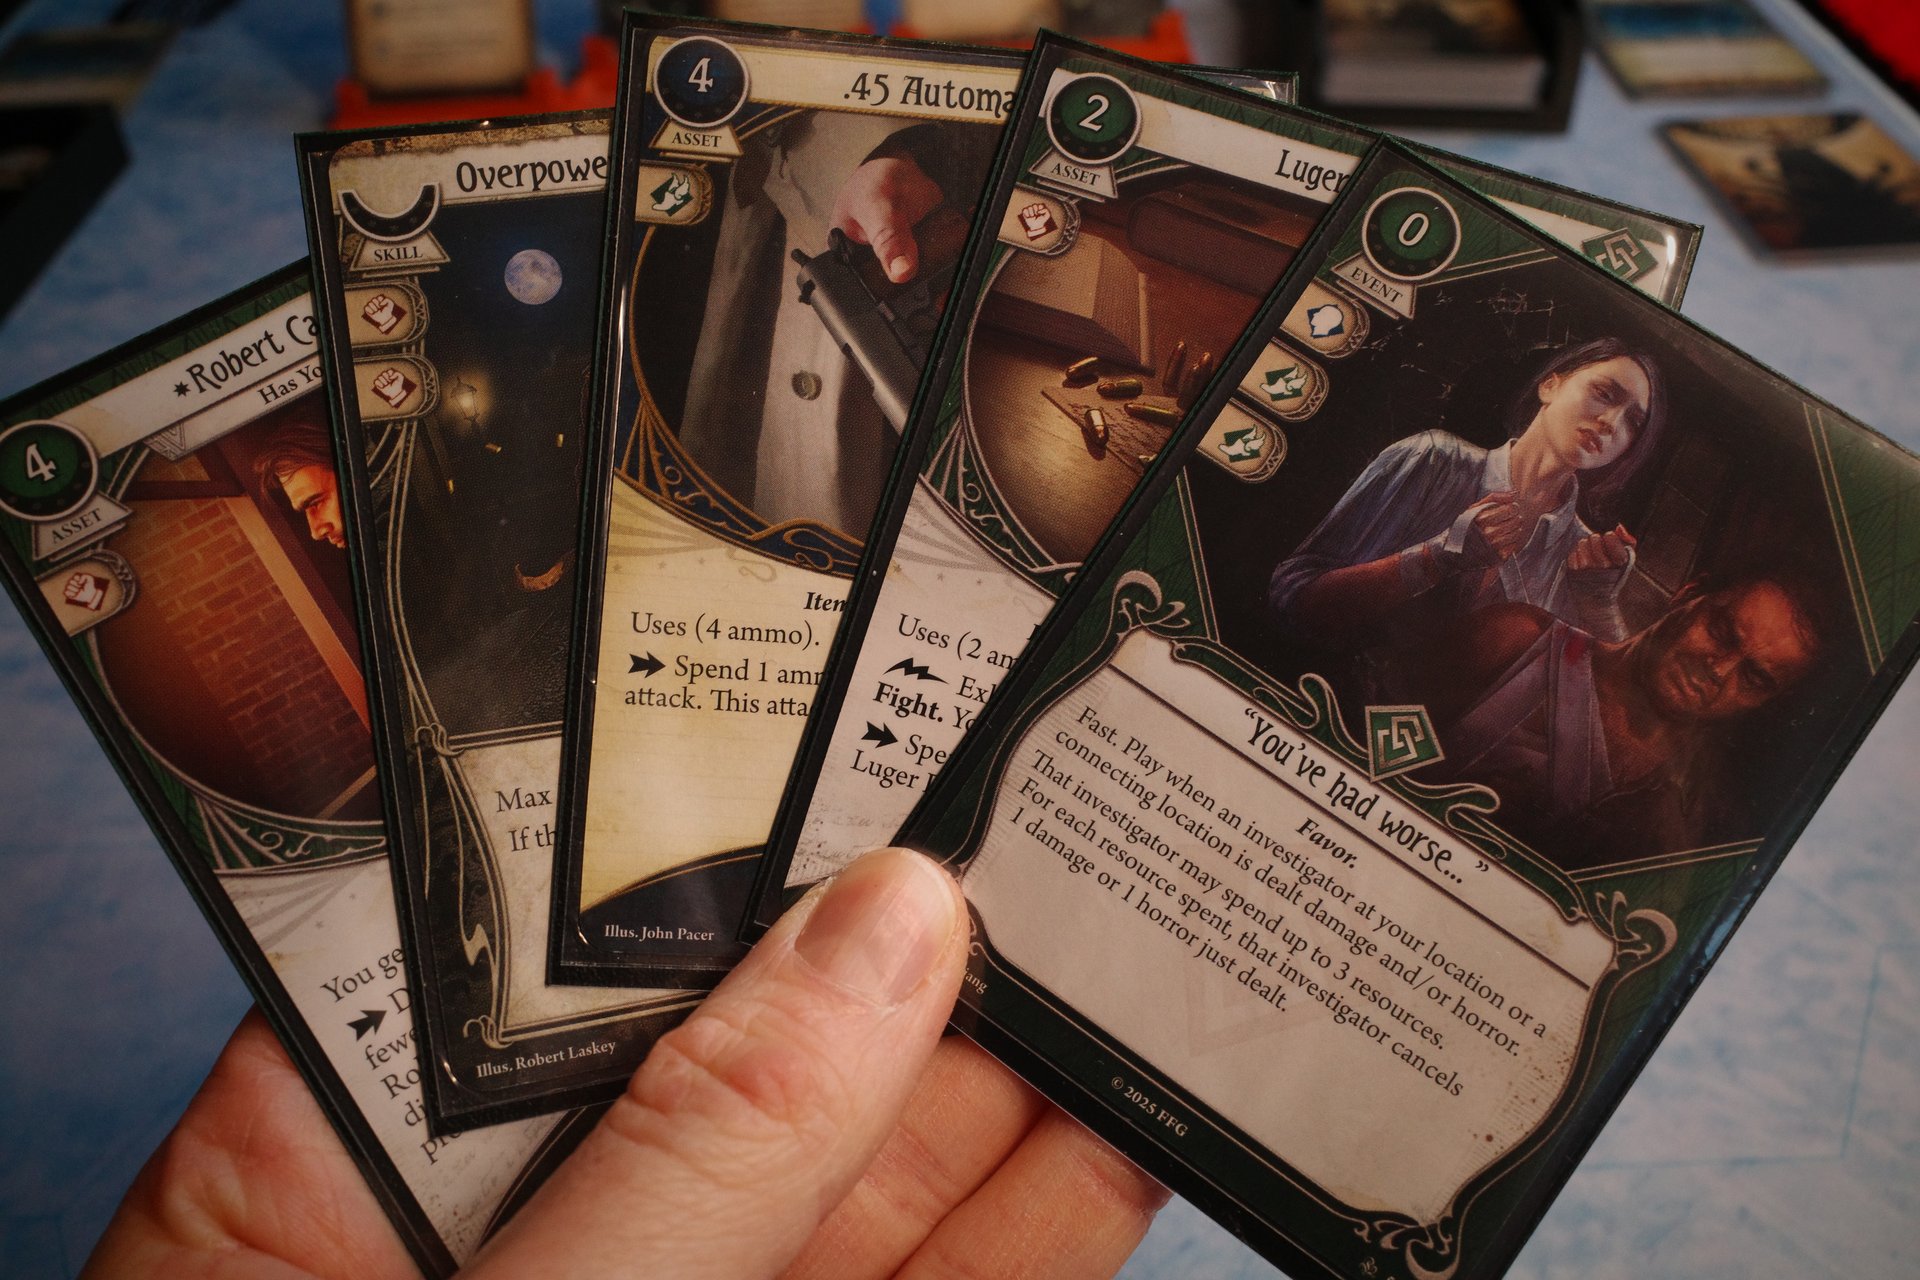
McGlen wants guns. Lots of guns. I think he’s really interesting investigator because he forces the use of firearms instead of melee weapons which are typically considered the superior weapons for fighters. Due to the deckbuilding restrictions we’re a bit limited in what we can take. E.g.
[Chicago Typewriter]
 and
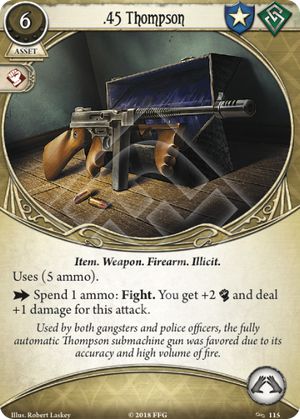
[.45 Thompson]
and
[.45 Thompson]
 , the quintessential gangster weapons, are no-go.
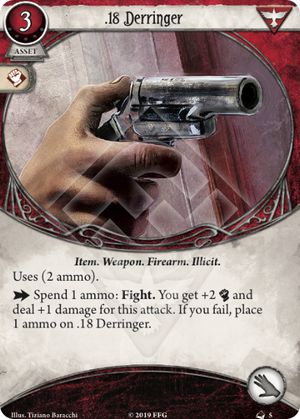
[.18 Derringer]
 ,
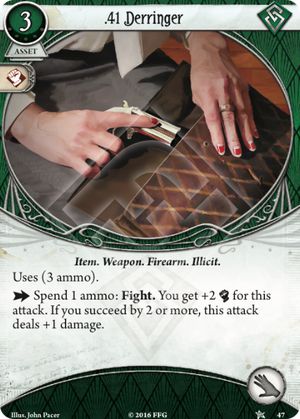
[.41 Derringer]
,
[.41 Derringer]
 ,
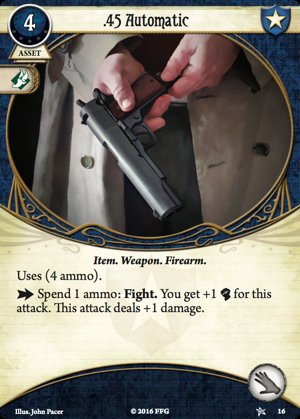
[.45 Automatic]
,
[.45 Automatic]
 ,
[Luger P08]
,
[Luger P08]
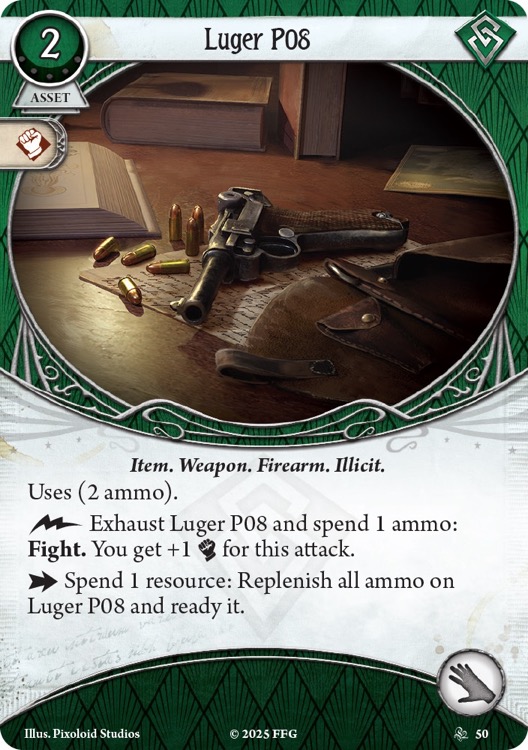 ,
[Remington Model 1858]
,
[Remington Model 1858]
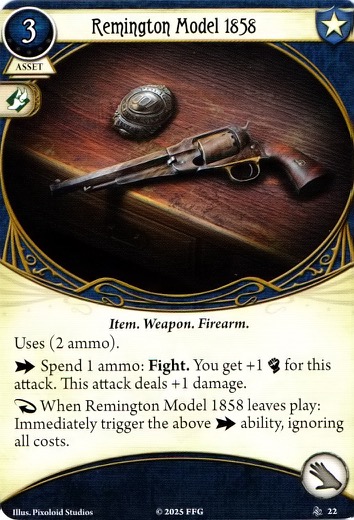 ,
[.25 Automatic]
,
[.25 Automatic]
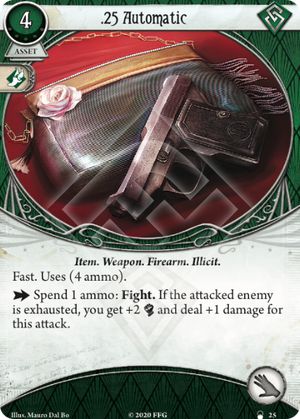 , and
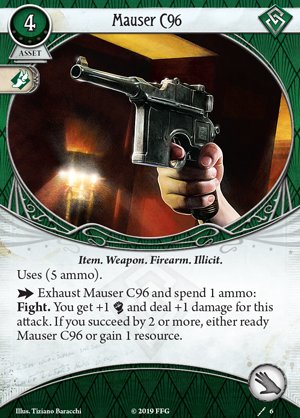
[Mauser C96]
, and
[Mauser C96]
 are our options. Ten guns in the deck seems about right. With
[Robert Castaigne]
are our options. Ten guns in the deck seems about right. With
[Robert Castaigne]
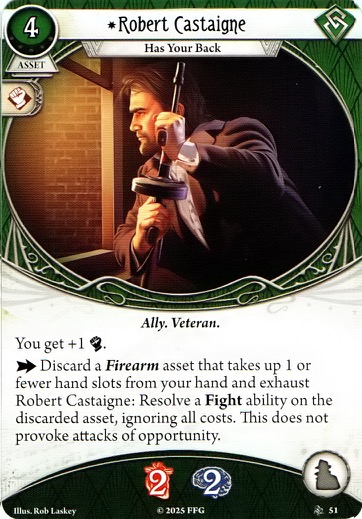 we can’t really have too many. Of those, the .25 isn’t useful because neither Michael nor Mateo plan to be doing much evading. The Mauser exhausts on use which could leave us vulnerable, especially if we have the Luger in the other hand (which we’ll typically want for the free action and resource generation).
As mentioned above, Castaigne allows us to not worry about overdrawing guns, since he can fire them off as cheap events. The extra fight is super solid and means Michael should have no problem hitting most enemies without committing. It’s also nice to play a rogue without Leo for once.
That’s the core of the deck sorted. We need to figure out what support cards we want.
[“Where’s the Party?”]
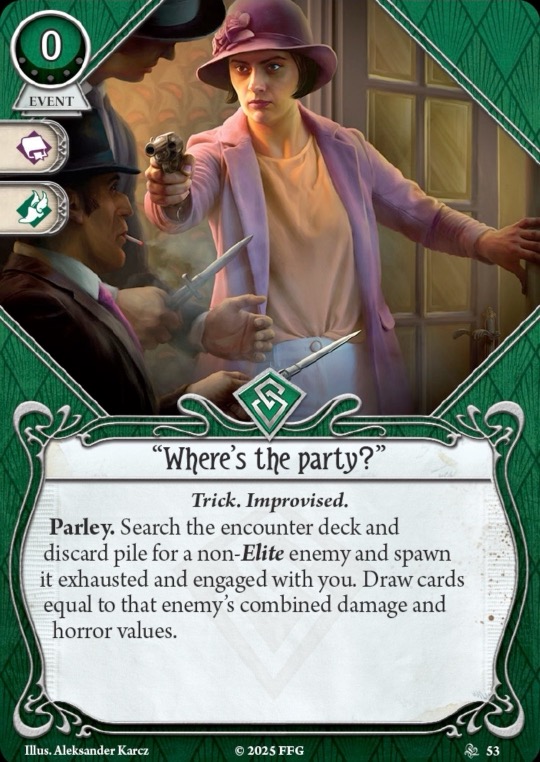 could be useful if we’re all setup but aren’t drawing enemies from the encounter deck. It can also search for victory points.
[Bum’s Rush]
could be useful if we’re all setup but aren’t drawing enemies from the encounter deck. It can also search for victory points.
[Bum’s Rush]
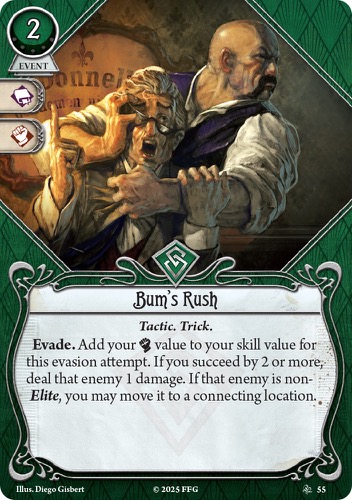 is great deck-tech, it tests at 8 baseline, which is incredible, and can allow us to totally ignore a non-hunting enemy by punting it to an explored location. Michael should be swimming in resources, so
[Hard Knocks]
is great deck-tech, it tests at 8 baseline, which is incredible, and can allow us to totally ignore a non-hunting enemy by punting it to an explored location. Michael should be swimming in resources, so
[Hard Knocks]
 and
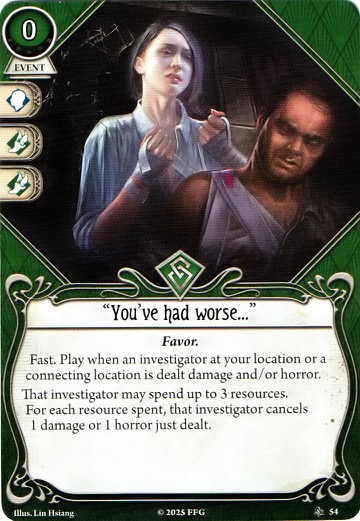
[“You’ve had Worse…”]
and
[“You’ve had Worse…”]
 are great resource dumps.
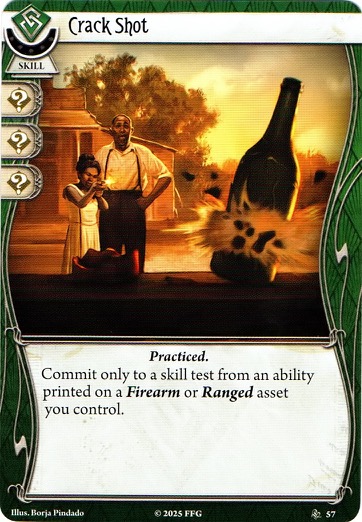
[Crack Shot]
are great resource dumps.
[Crack Shot]
 seems like a no-brainer for helping with tougher enemies, and the suite of
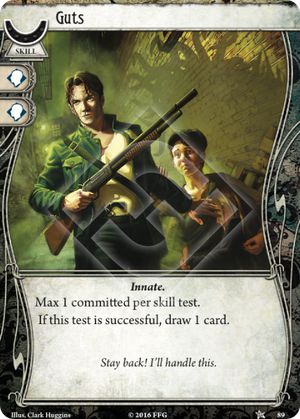
[Guts]
seems like a no-brainer for helping with tougher enemies, and the suite of
[Guts]
 ,
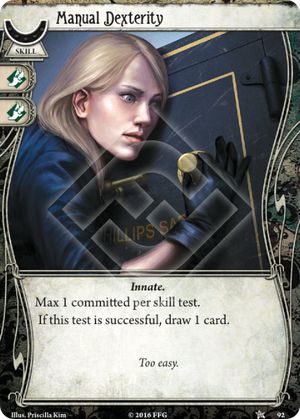
[Manual Dexterity]
,
[Manual Dexterity]
 , and
[Overpower]
, and
[Overpower]
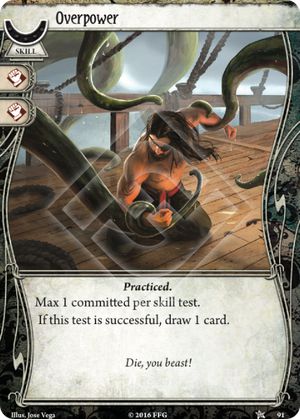 rounds out our skills.
[Lucky Cigarette Case]
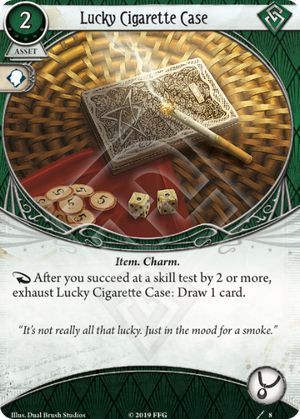 is the only available accessory slot asset available to us and seems to fit well. Card draw is always good and we’ll be over-succeeding a lot with such high fight. It does take up
[“Viola” Case]
is the only available accessory slot asset available to us and seems to fit well. Card draw is always good and we’ll be over-succeeding a lot with such high fight. It does take up
[“Viola” Case]
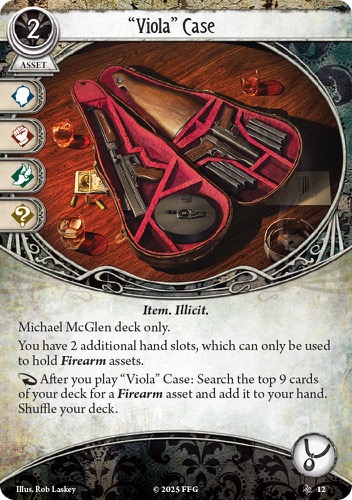 ’s slot, but we don’t really need the extra hand slots so will likely want to commit it most of the time. Finally, Michael at least wants to appear to help out Mateo with
[Pilfer]
’s slot, but we don’t really need the extra hand slots so will likely want to commit it most of the time. Finally, Michael at least wants to appear to help out Mateo with
[Pilfer]
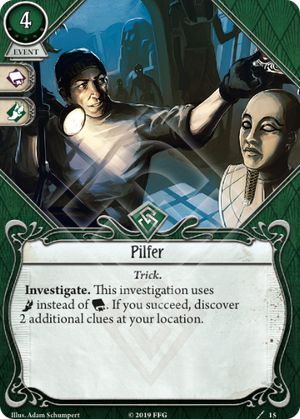 . It tests at base 4 which isn’t great, but on a low shroud with a few commits, grabbing three clues in one action could prove pivotal.
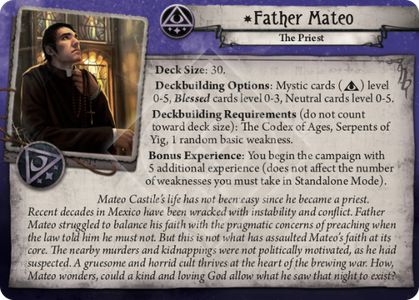
Father Mateo
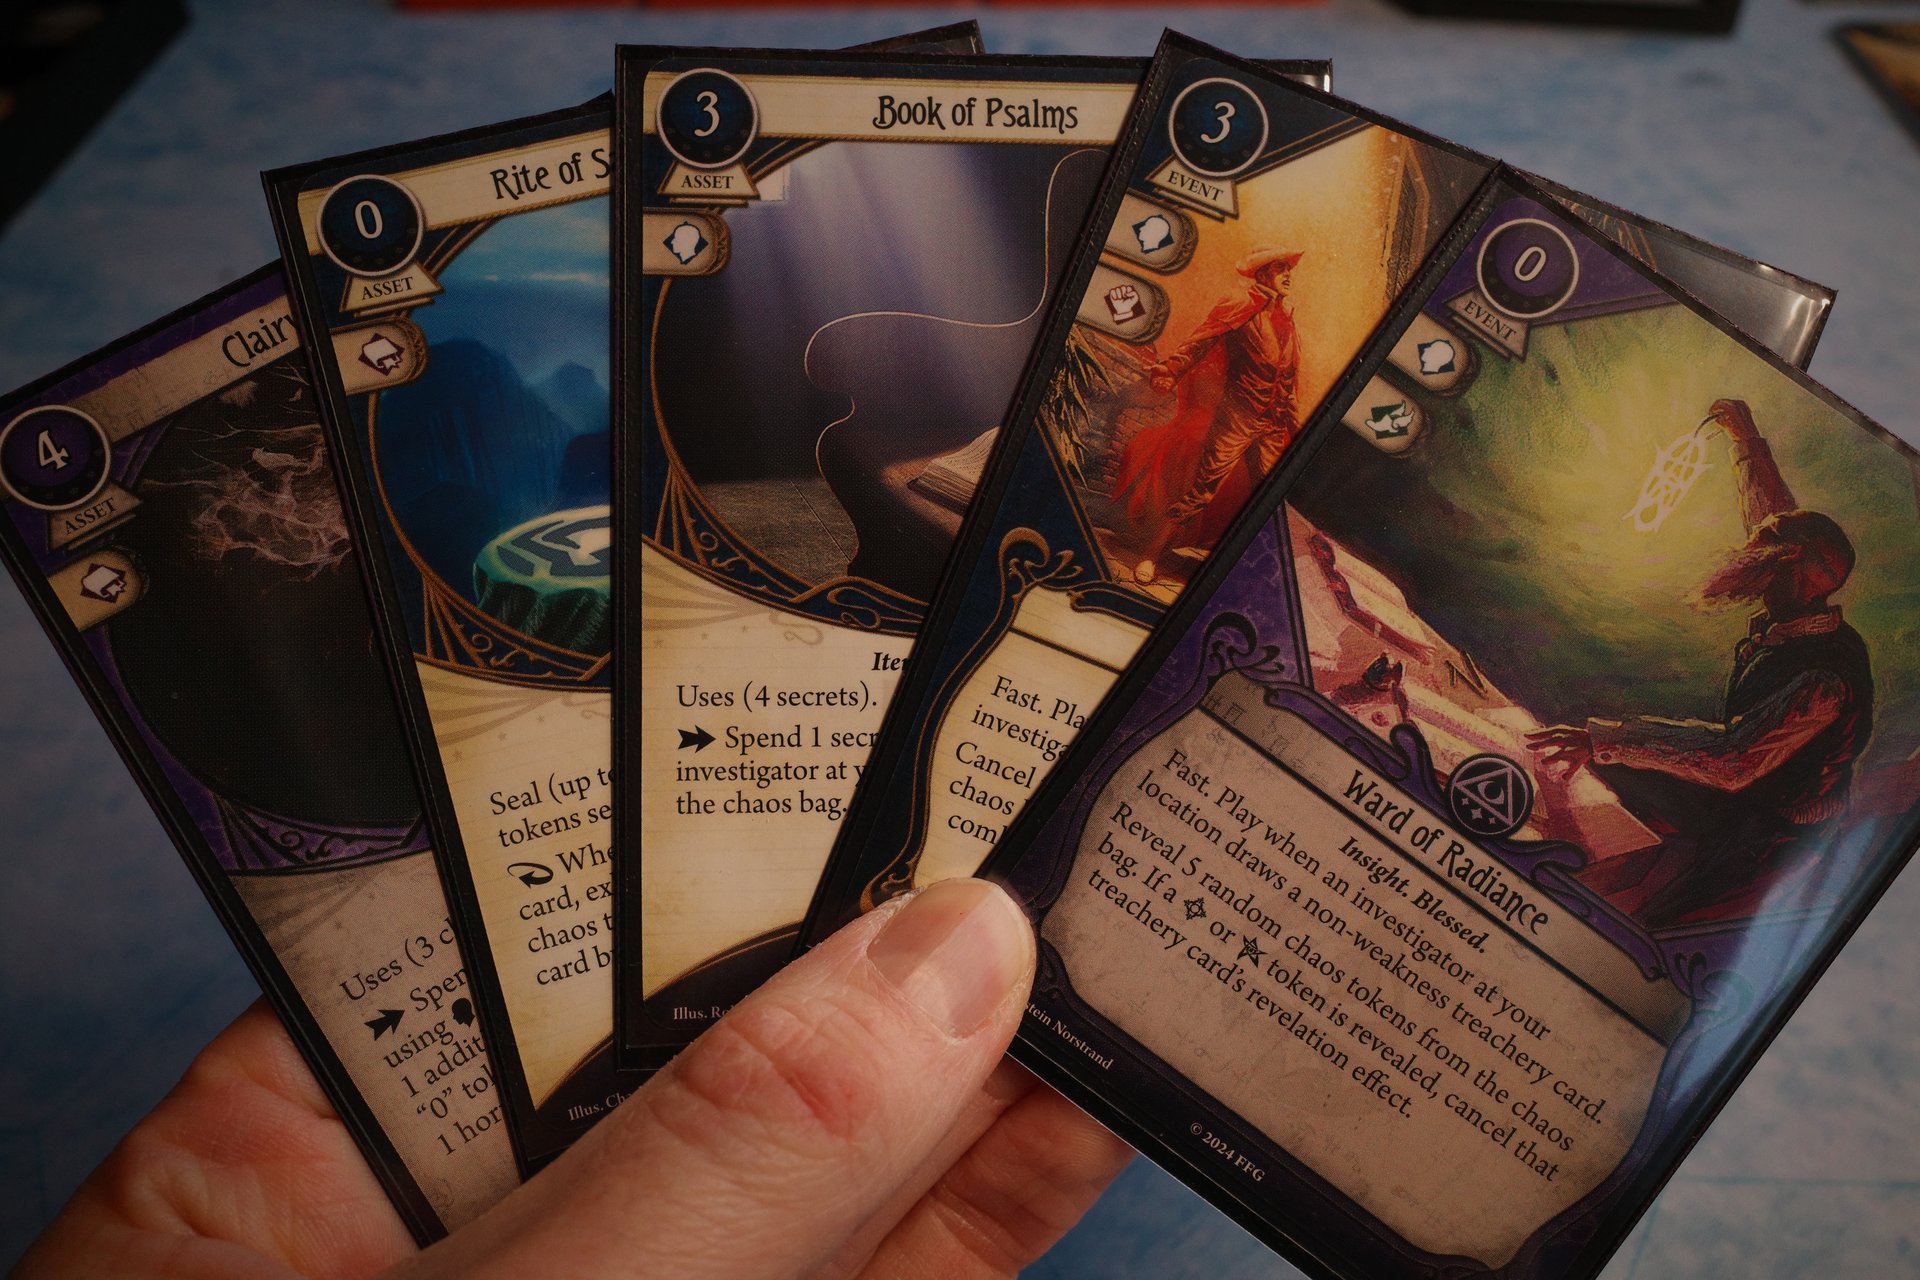
The Good Father is going to be harder to build than McGlen. His primary task is clueing but the deck restrictions limit him significantly in spells that investigate. The options are
[Clairvoyance]
 ,
[Eye of Chaos]
,
[Eye of Chaos]
 , and
[Rite of Seeking(2)]
, and
[Rite of Seeking(2)]
.jpg) . The Forgotten Age didn’t include an arcane asset for investigating, maybe because of Mateo’s somewhat respectable 3 intelligence which makes it possible to perform the regular old style of investigating. Eye of Chaos doesn’t make sense for us since we’re not using curse tokens. An option could be to spend four of our five starting experience on Rite of Seeking, but there are some other things I want to spend those on…
. The Forgotten Age didn’t include an arcane asset for investigating, maybe because of Mateo’s somewhat respectable 3 intelligence which makes it possible to perform the regular old style of investigating. Eye of Chaos doesn’t make sense for us since we’re not using curse tokens. An option could be to spend four of our five starting experience on Rite of Seeking, but there are some other things I want to spend those on…
I want to incorporate l (bless) tokens into the deck, since it seems like such a win thematically and I’ve never built a deck around them before.
For l generation, the gold standard is
[Keep Faith]
 so that’s an auto-include.
[Hand of Fate]
so that’s an auto-include.
[Hand of Fate]
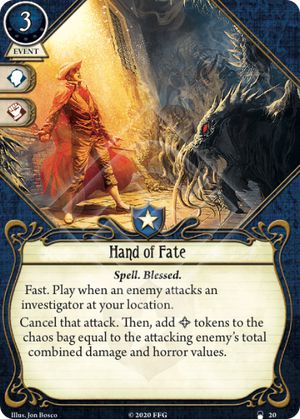 is a situational and expensive dodge that adds l, so we’ll take one of those.
[Book of Psalms]
is a situational and expensive dodge that adds l, so we’ll take one of those.
[Book of Psalms]
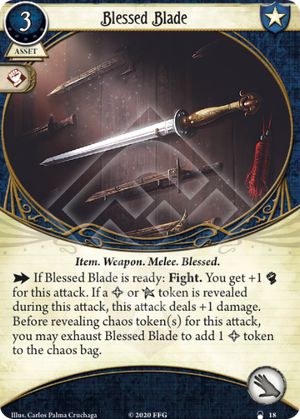
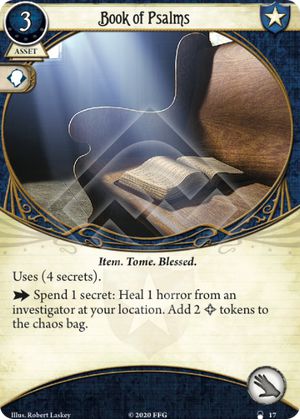 is also very expensive, both in resources and actions, but will help McGlen’s sanity problems while also filling the bag with blesses. Unfortunately there aren’t a whole lot more ways to get blesses into the bag, short of going a more fighty route with
[Blessed Blade]
is also very expensive, both in resources and actions, but will help McGlen’s sanity problems while also filling the bag with blesses. Unfortunately there aren’t a whole lot more ways to get blesses into the bag, short of going a more fighty route with
[Blessed Blade]
 and
[Righteous Hunt]
and
[Righteous Hunt]
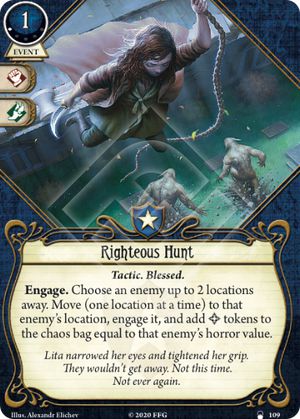 , but that’s not feasible with Mateo’s low fight and how much it would harm our clueing ability. Once we have some experience,
[Holy Rosary(2)]
, but that’s not feasible with Mateo’s low fight and how much it would harm our clueing ability. Once we have some experience,
[Holy Rosary(2)]
.jpg) will be an important upgrade, and we’ll include the level 0 version,
[Holy Rosary]
will be an important upgrade, and we’ll include the level 0 version,
[Holy Rosary]
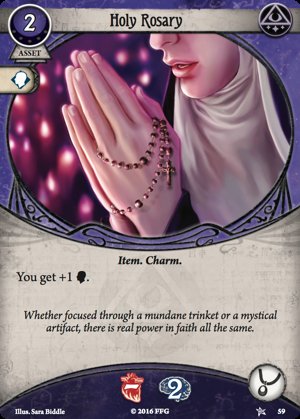 , for a willpower boost.
[St. Hubert’s Key]
, for a willpower boost.
[St. Hubert’s Key]
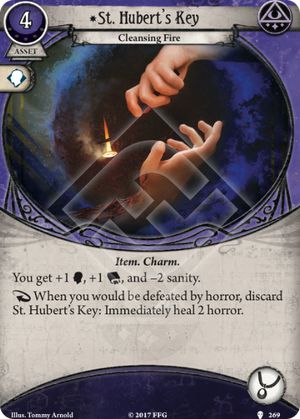 would have been great, since we’re planning to use both willpower and intelligence to investigate, but it’s from Carcosa.
The reason for going bless is Mateo has a huge amount of powerful payoff.
[Rite of Sanctification]
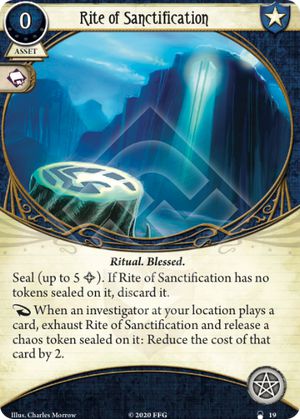 can provide a huge 10 resources shared amongst both investigators, though I expect it will rarely get that full value. I’m hoping this will facilitate lots of the high resource cost cards in both decks.
[Favor of the Sun]
can provide a huge 10 resources shared amongst both investigators, though I expect it will rarely get that full value. I’m hoping this will facilitate lots of the high resource cost cards in both decks.
[Favor of the Sun]
 and
[Ancient Covenant]
and
[Ancient Covenant]
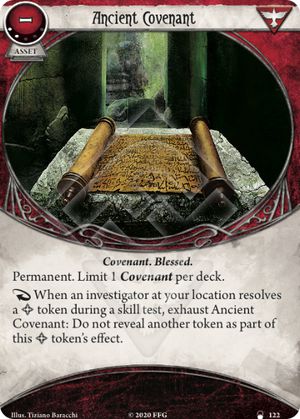 is a hugely powerful combo that allows three auto-successes, which is self explanatorily great.
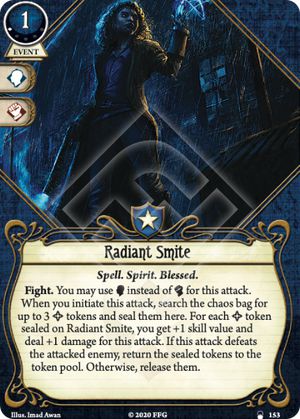
[Radiant Smite]
is a hugely powerful combo that allows three auto-successes, which is self explanatorily great.
[Radiant Smite]
 , like McGlen’s
[Pilfer]
, is included mostly to show a willingness to adapt and help Michael if shit gets real.
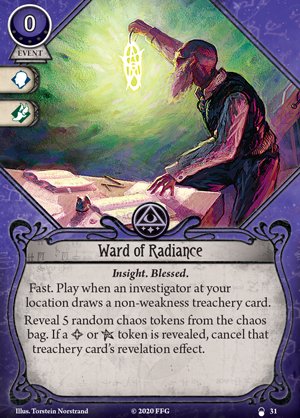
[Ward of Radiance]
, like McGlen’s
[Pilfer]
, is included mostly to show a willingness to adapt and help Michael if shit gets real.
[Ward of Radiance]
 is like a free
[Ward of Protection]
is like a free
[Ward of Protection]
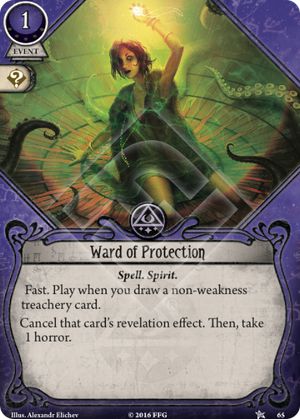 , with the downside of being unreliable without lots of blesses in the bag. This might end up whiffing more than it’s worth. We’ll include a regular Ward of Protection as well.
For skills,
[Enraptured]
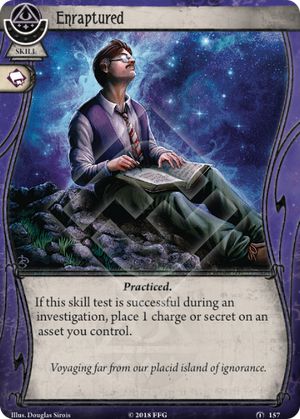 allows us to gain more valuable charges on
[Clairvoyance]
, which is our only big investigation tool for now.
[Prescient]
allows us to gain more valuable charges on
[Clairvoyance]
, which is our only big investigation tool for now.
[Prescient]
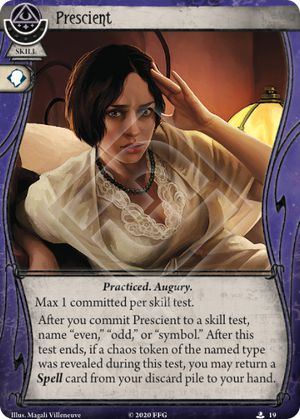 synergises with bless tokens and potentally allows us to recurse important spells such as
[Clairvoyance]
or
[Ward of Protection]
.
synergises with bless tokens and potentally allows us to recurse important spells such as
[Clairvoyance]
or
[Ward of Protection]
.
[Flashlight]
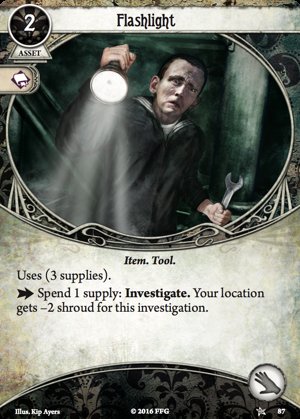 is included as secondary clueing power if
[Clairvoyance]
isn’t available, or for low shroud locations. Finally,
[Olive McBride]
is included as secondary clueing power if
[Clairvoyance]
isn’t available, or for low shroud locations. Finally,
[Olive McBride]
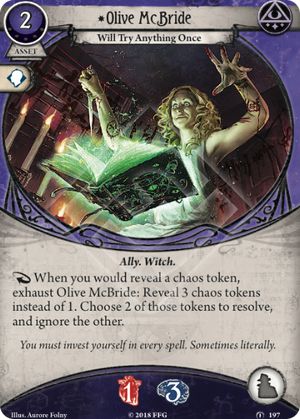 offers decent soak and synergises with some of our bless cards like
[Ward of Radiance]
.
offers decent soak and synergises with some of our bless cards like
[Ward of Radiance]
.
I’m less confident about this deck than I am about Michael’s. We’ll be hard mulliganing for
[Keep Faith]
and
[Clairvoyance]
. I think upgrades will make or break the deck.
Weaknesses
For weaknesses I like to draw three, discard one, and randomly select between the remaining two. This allows the elimination of disasterous weaknesses that would heavily punish any given deck, while still staying true to the thematic implications of a random weakness.
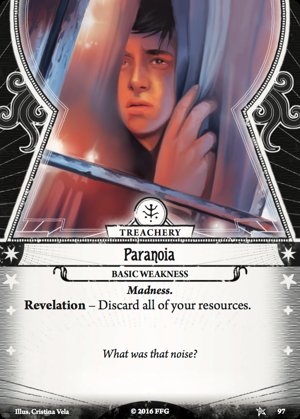
Michael draw
[Your Worst Nightmare]
 ,
[Paranoia]
, and
[Obsessive]
,
[Paranoia]
, and
[Obsessive]
 .
[Your Worst Nightmare]
, while incredible from a thematic perspective (with Mateo being the only one to absolve McGlen of his darkest sins), it would have been too punishing since Mateo has very few ways to deal with a three health monster. McGlen ended up being burdened with
[Paranoia]
, which is still somewhat appropriate given his propensity for gaining resources.
.
[Your Worst Nightmare]
, while incredible from a thematic perspective (with Mateo being the only one to absolve McGlen of his darkest sins), it would have been too punishing since Mateo has very few ways to deal with a three health monster. McGlen ended up being burdened with
[Paranoia]
, which is still somewhat appropriate given his propensity for gaining resources.
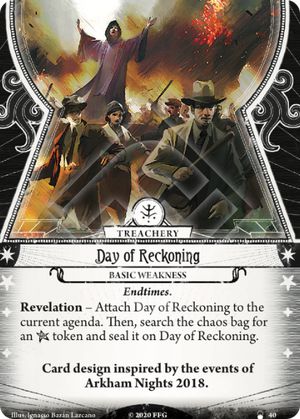
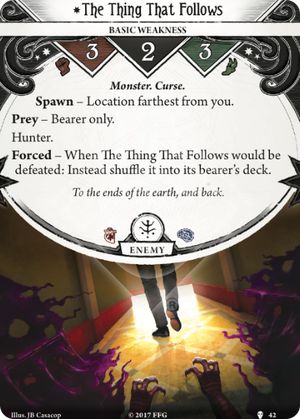
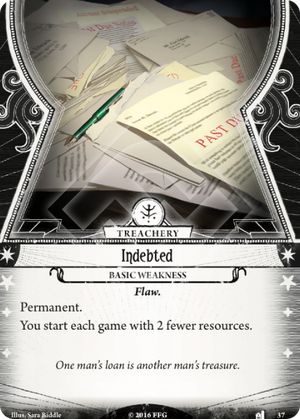
Mateo’s options were
[The Thing That Follows]
 ,
[Day of Reckoning]
, and
[Indebted]
,
[Day of Reckoning]
, and
[Indebted]
 . For similar reasons to above,
[The Thing That Follows]
would have been pretty bad though not terrible, typically taking McGlen a couple of actions to deal with (since “Prey - Bearer only” means he would have to engage it). In any case, I really wanted
[Day of Reckoning]
since it seems such a thematic weakness given Mateo’s strong Elder Sign.
[Paranoia]
is a pretty boring weakness, and while it would have been easier to deal with than
[Day of Reckoning]
, I was very pleased when the latter was selected.
. For similar reasons to above,
[The Thing That Follows]
would have been pretty bad though not terrible, typically taking McGlen a couple of actions to deal with (since “Prey - Bearer only” means he would have to engage it). In any case, I really wanted
[Day of Reckoning]
since it seems such a thematic weakness given Mateo’s strong Elder Sign.
[Paranoia]
is a pretty boring weakness, and while it would have been easier to deal with than
[Day of Reckoning]
, I was very pleased when the latter was selected.
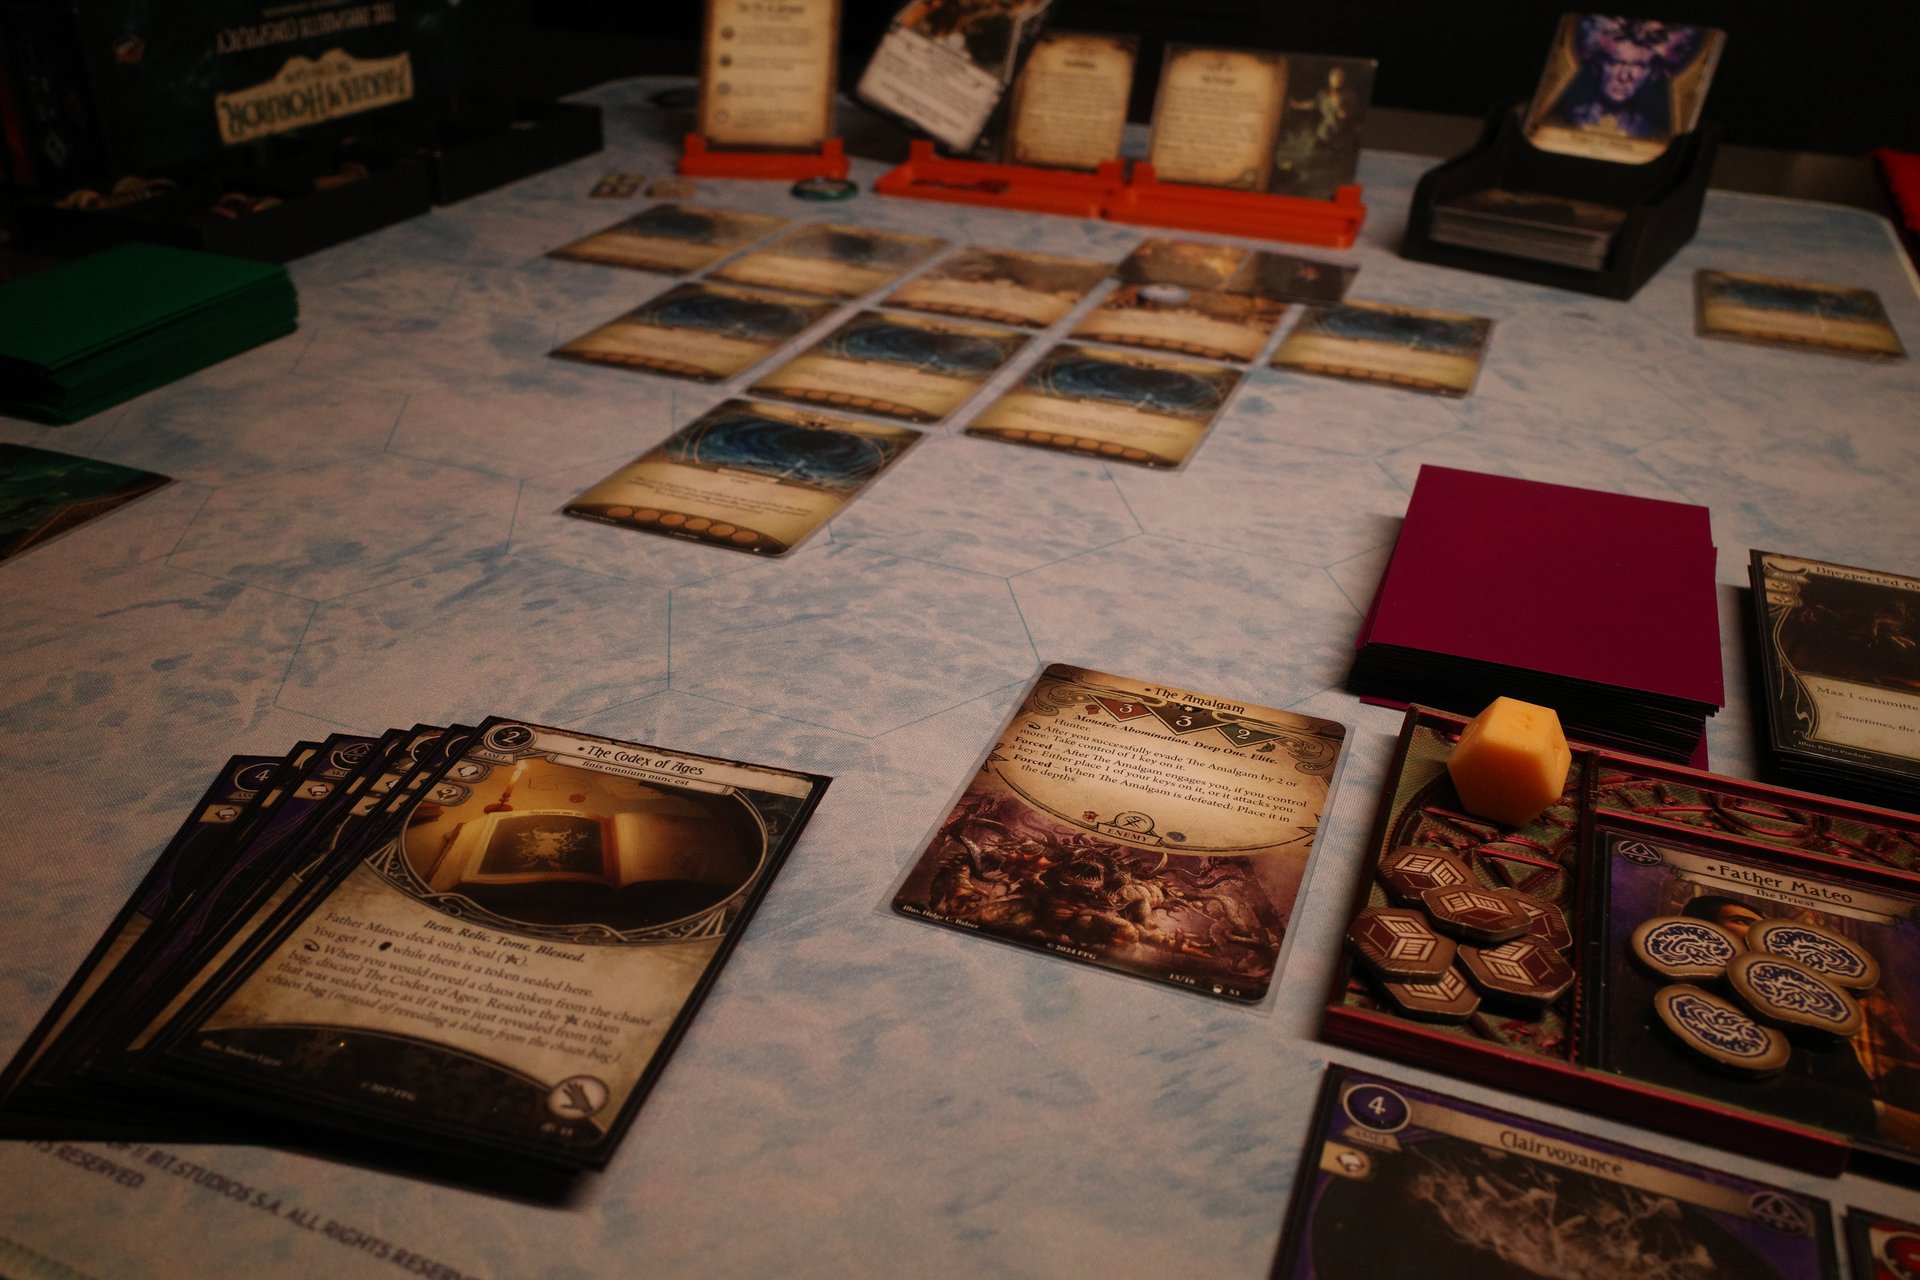
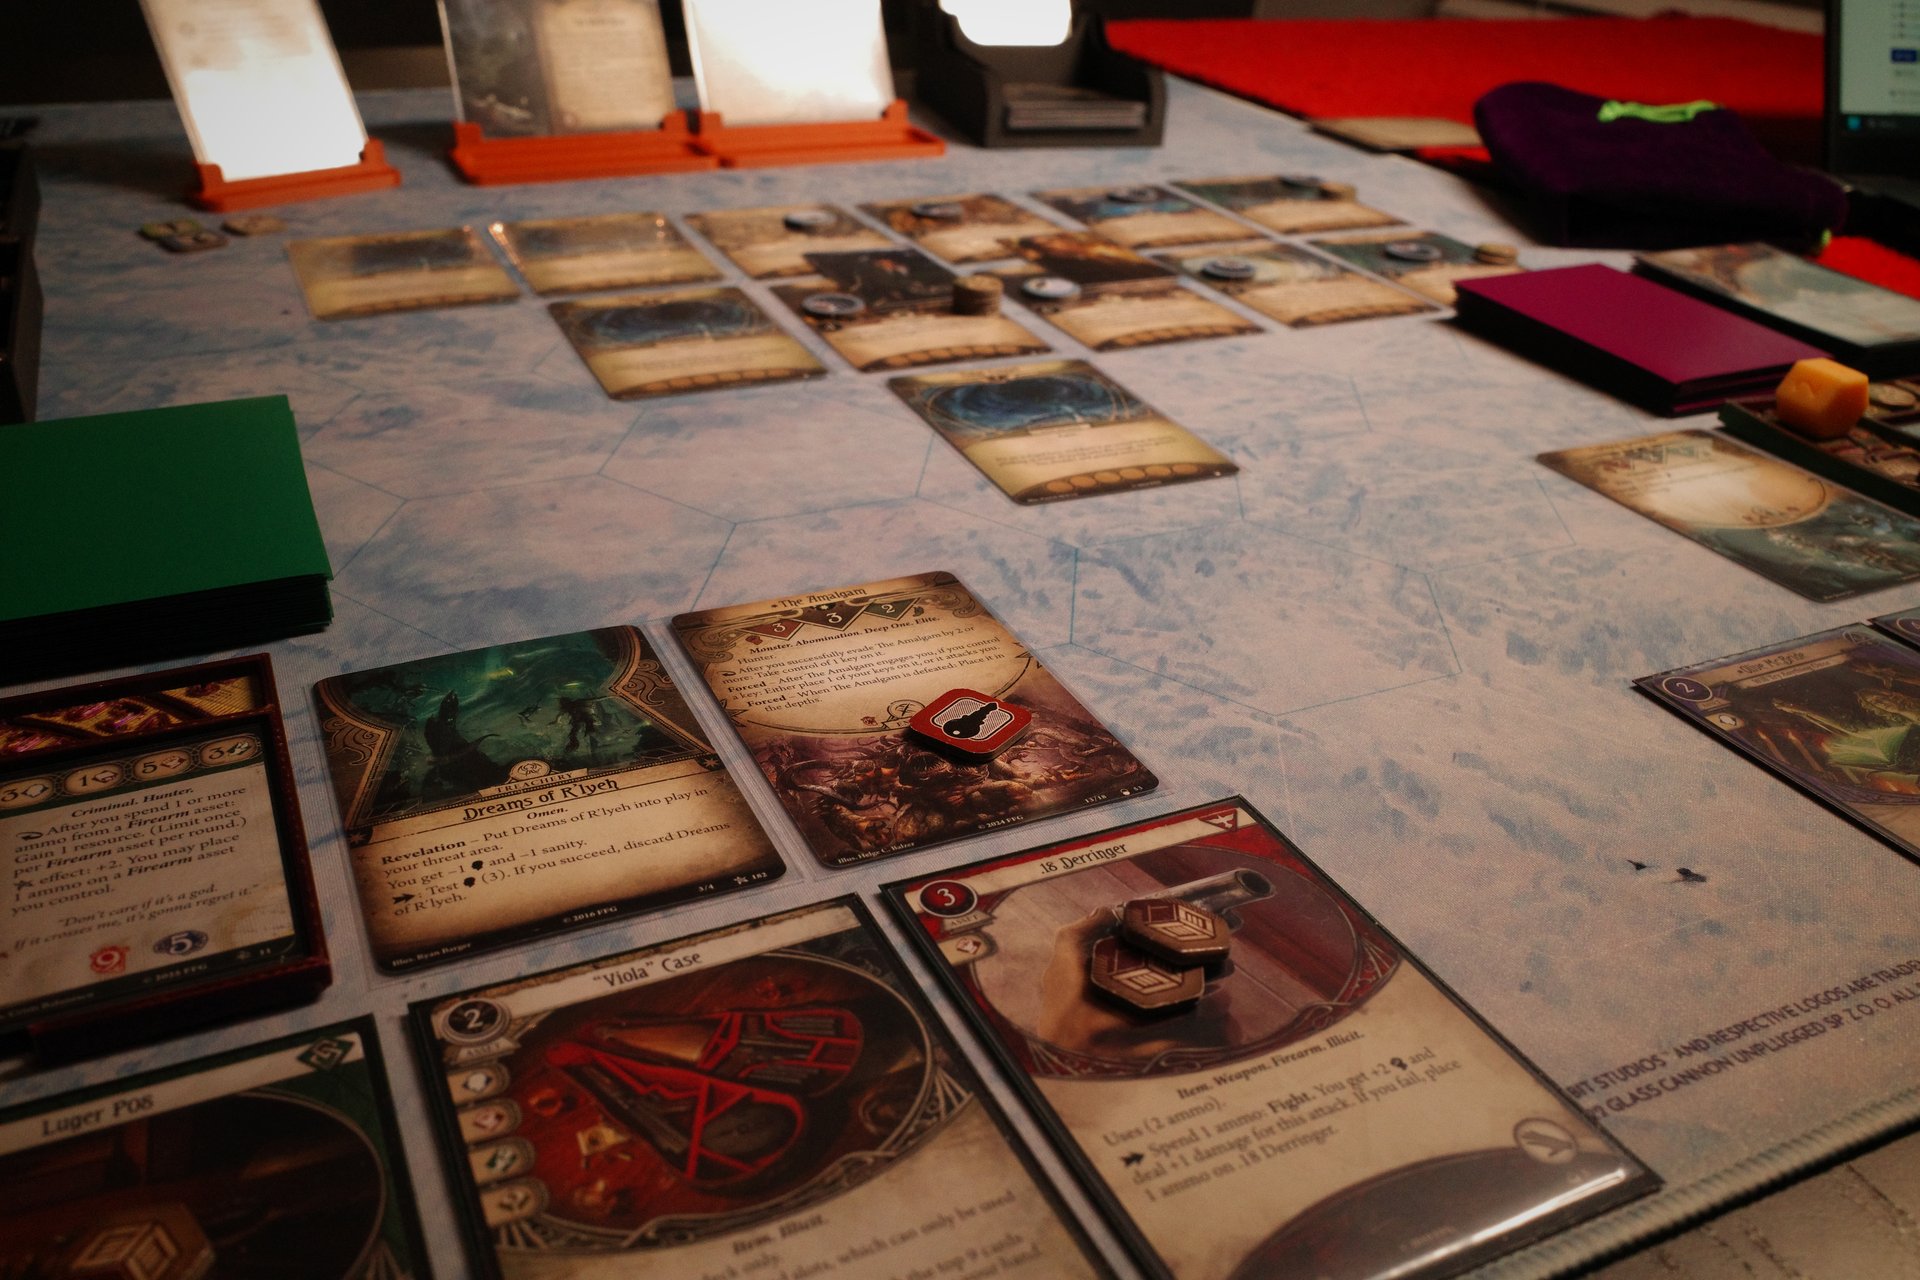
Scenario 1 - The Pit of Despair
The first thing I noticed when setting up the campaign was the size of the chaos bag. 20 tokens! That’s far more than others, which typically have 16 or in the case of Forgotten Age (Mateo’s ‘home’ campaign) 14. This immediately reduces the effectiveness of Mateo’s inherently powerful Elder Sign ability and his deck built on bless tokens. Lets hope we remove some chaos tokens at some point in the campaign.
Father Mateo will be guilding us through the darkness, as lead investigator for the first scenario.
During setup it’s revealed that uncovering flashbacks could potentially remove tokens from the chaos bag, so that will be a high priority secondary objective for the duo.
Mateo’s opening hand is
[Clairvoyance]
,
[Rite of Sanctification]
,
[Book of Psalms]
,
[Hand of Fate]
, and
[Ward of Radiance]
. Not bad, we have a way to supercharge clueing and a way to put blesses in the bag, though quite conditionally.
Michael doesn’t fare too bad either, finding
[Robert Castaigne]
,
[Overpower]
,
[.45 Automatic]
,
[Luger P08]
, and
[“You’ve had Worse…”]
. That should be enough firepower to begin with though we’ve already run into resource issues. Lets hope Mateo can get some blesses going to activate
[Rite of Sanctification]
ASAP.
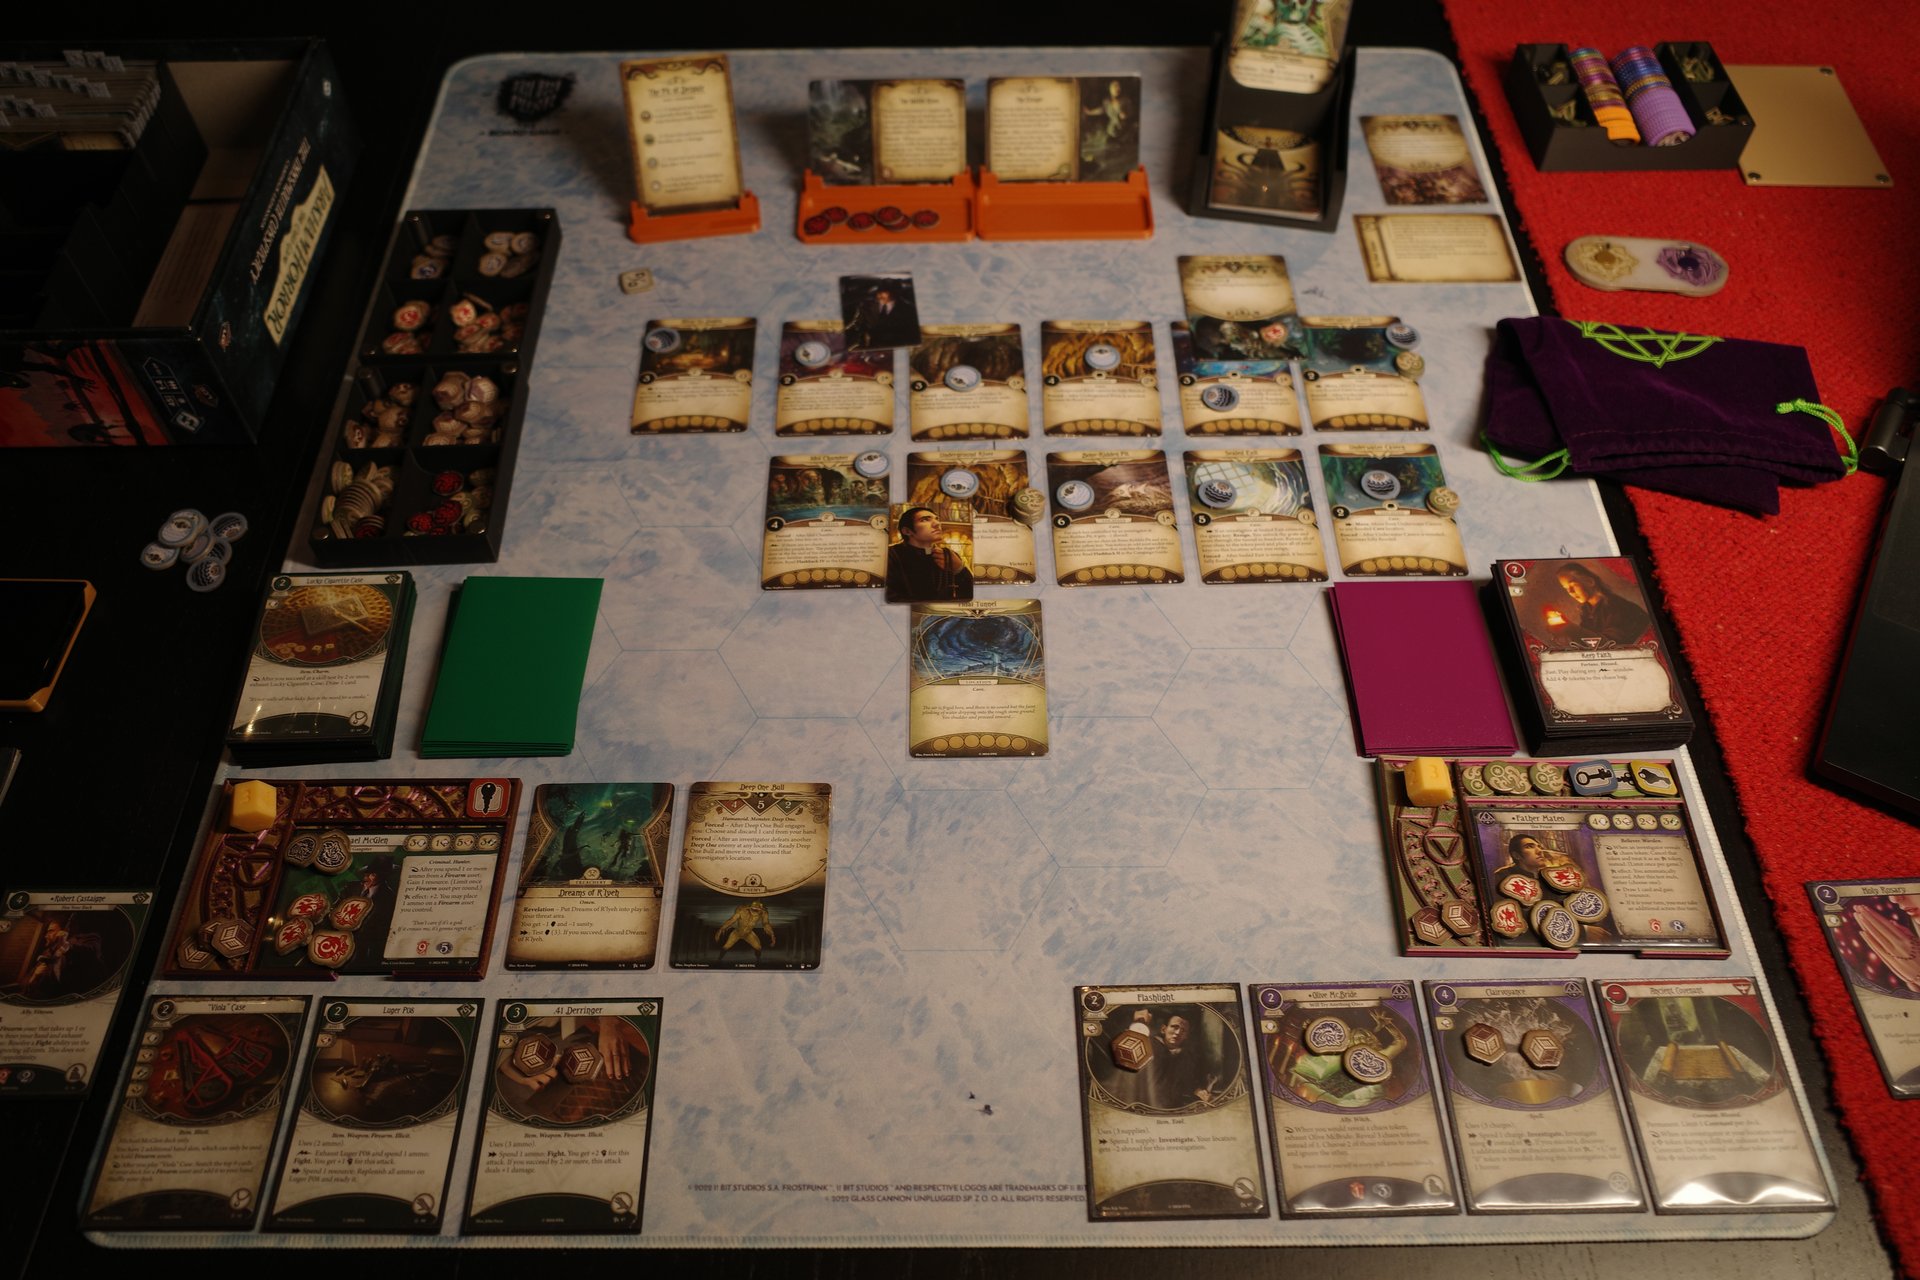
Round 1
Investigators
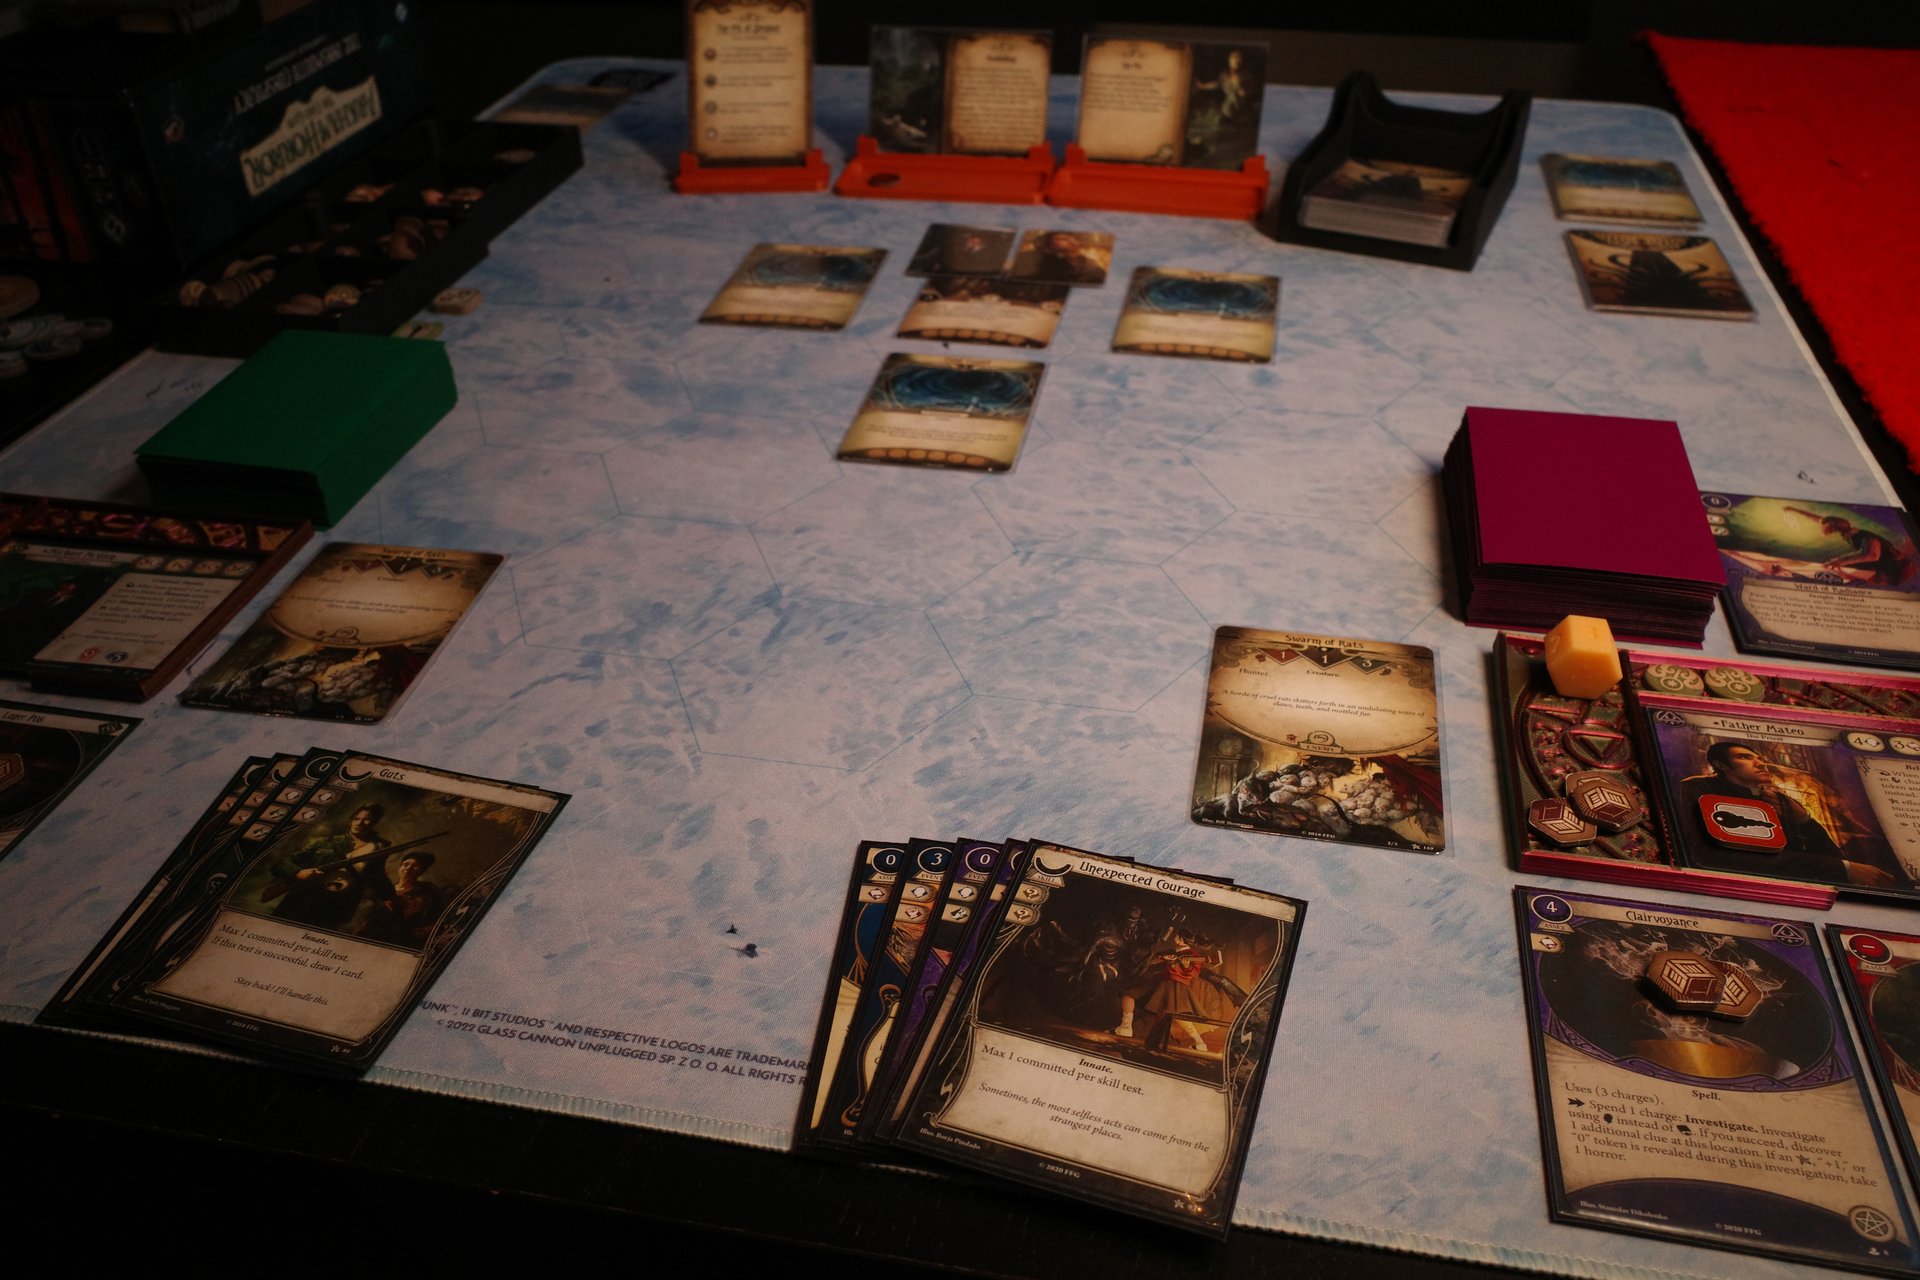
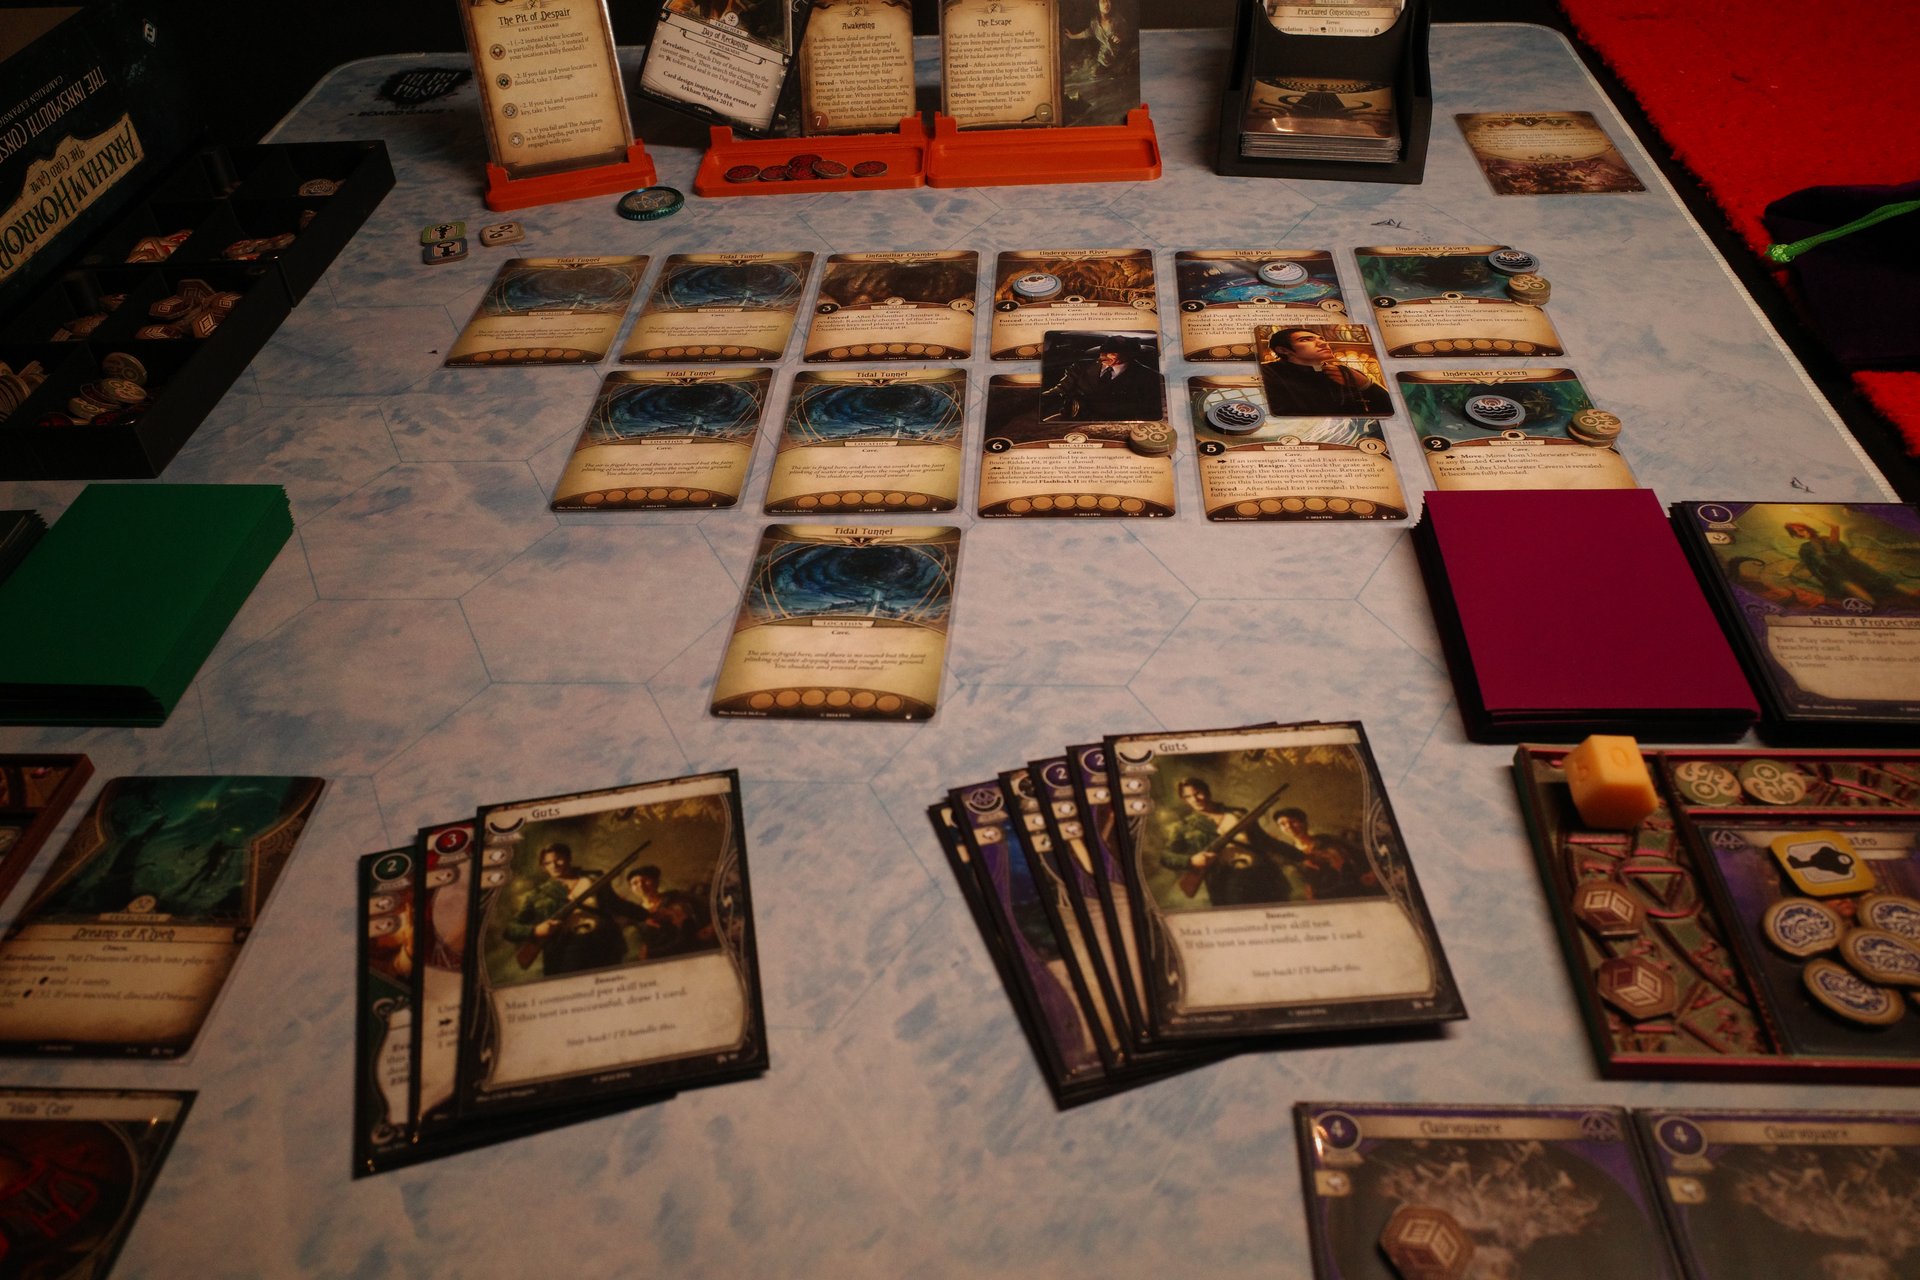
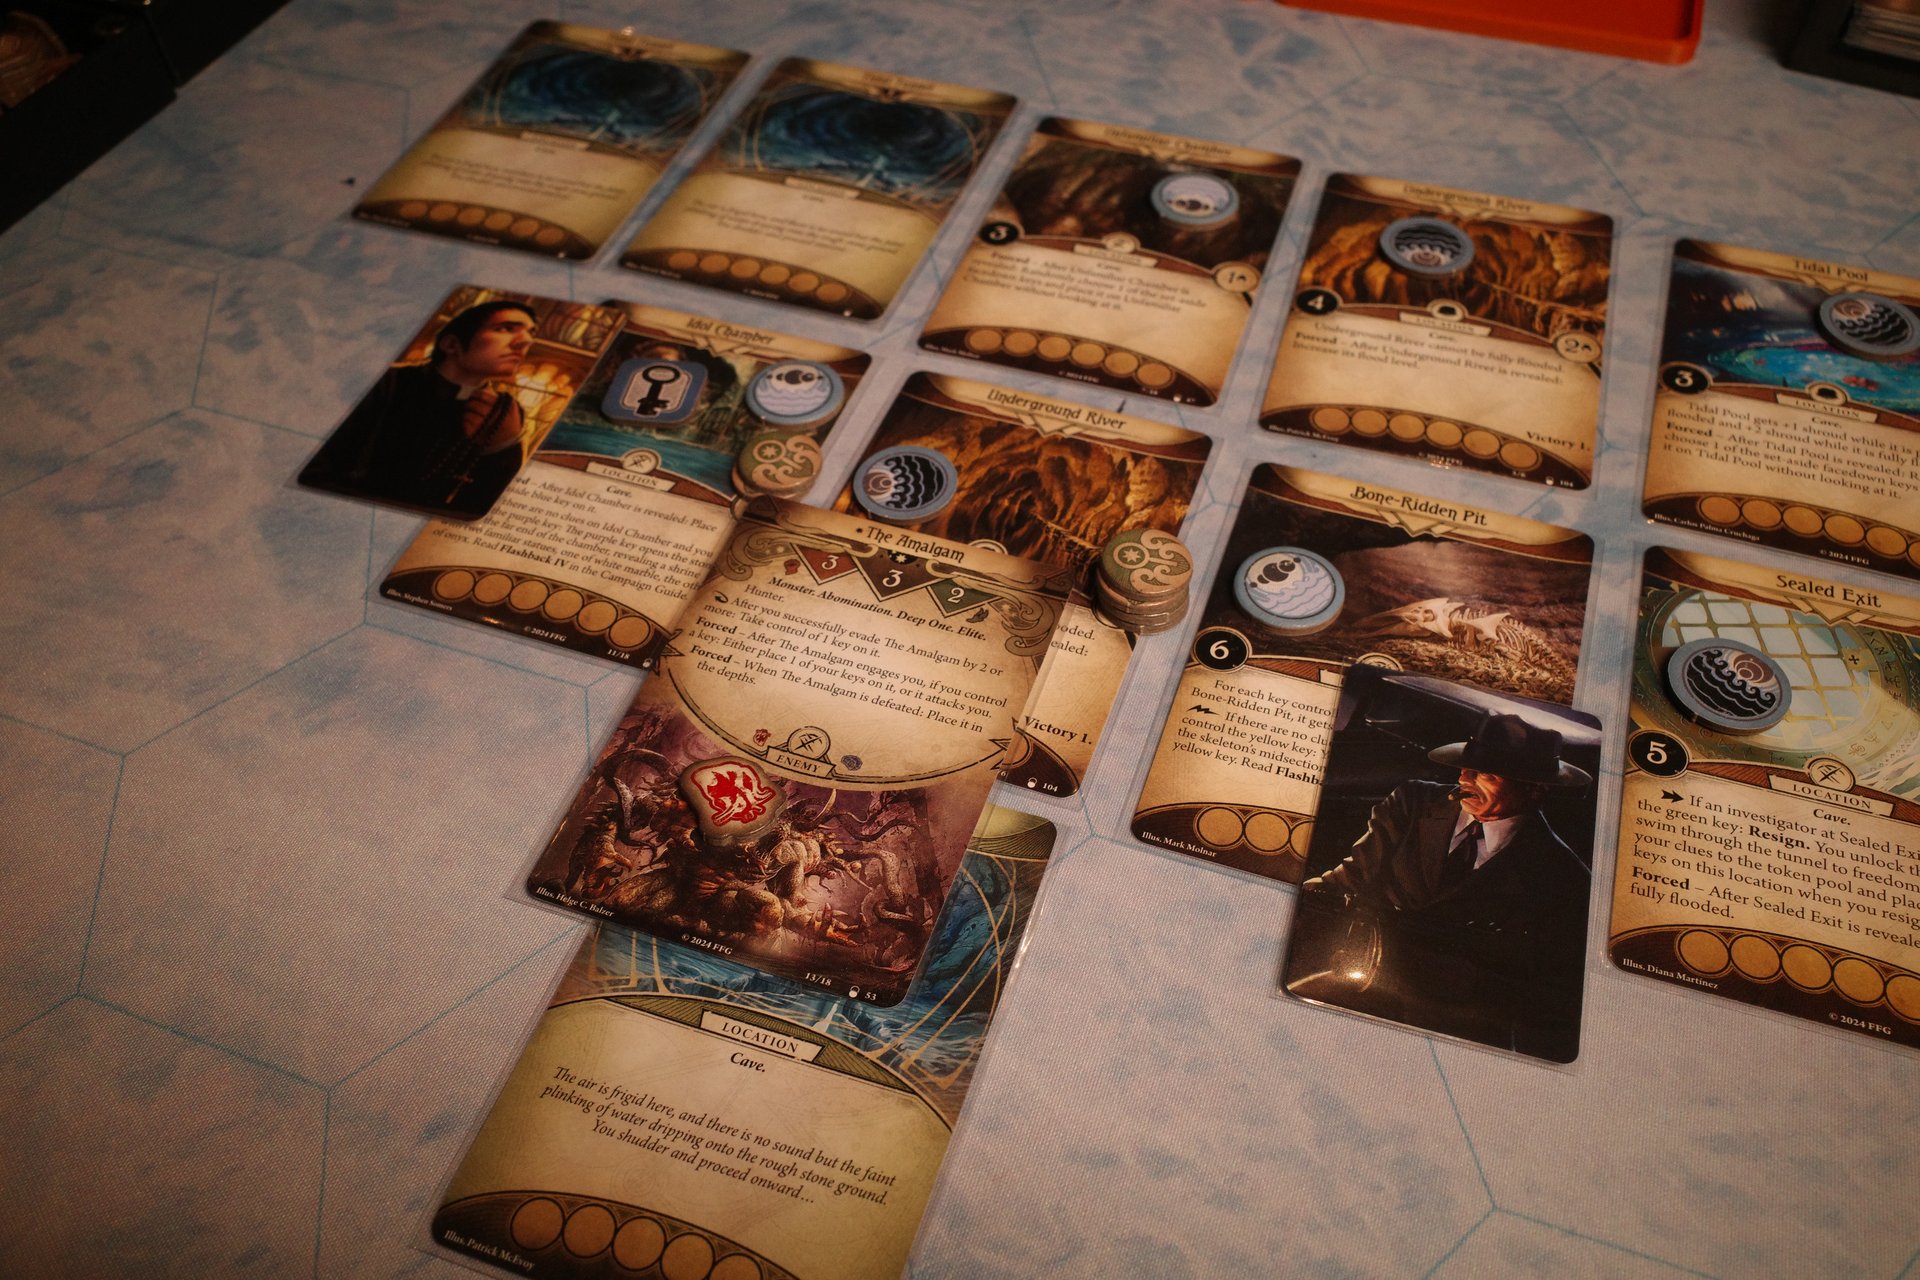
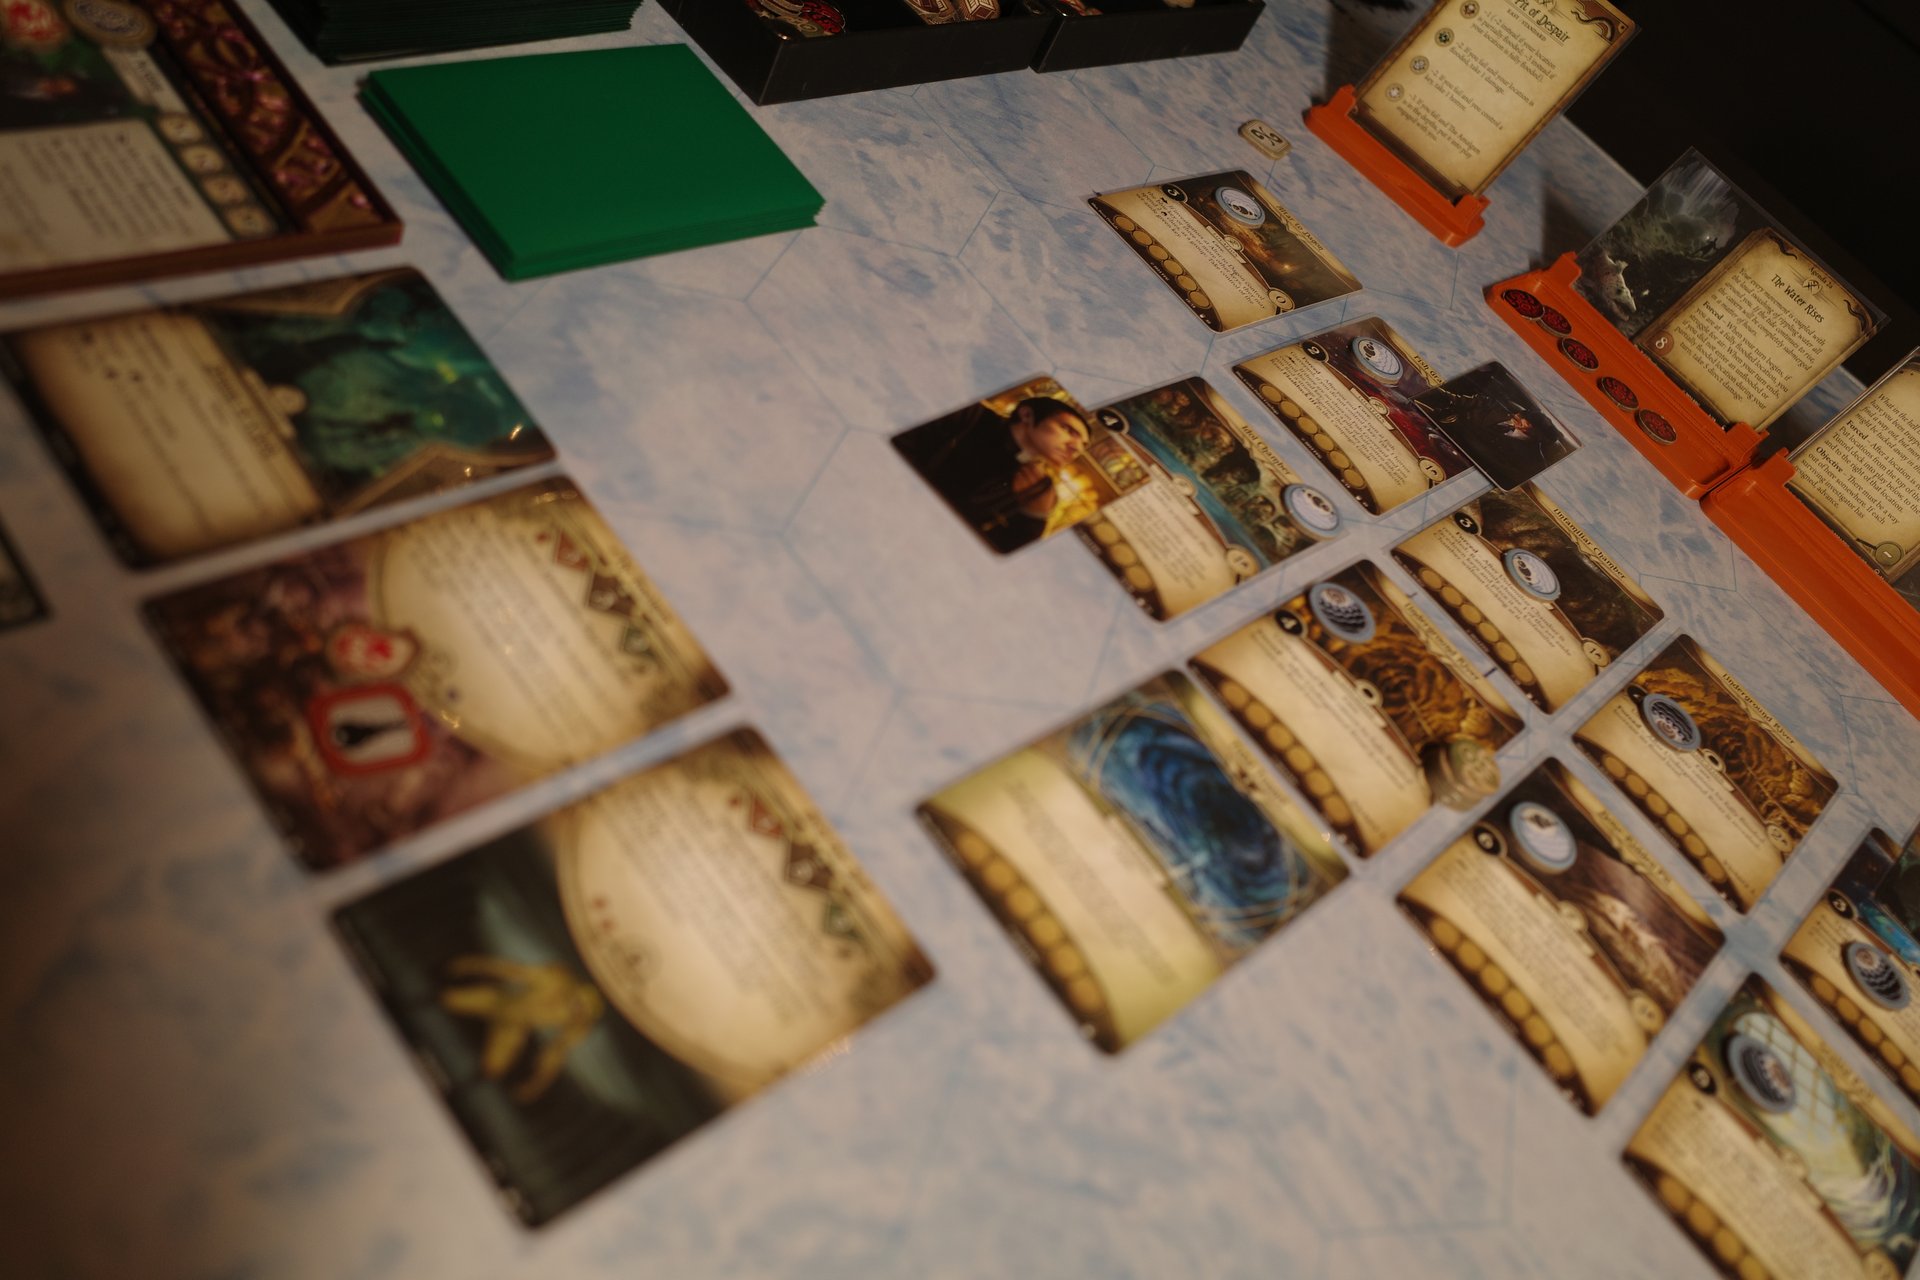
Lets assess. We’ve woken up with no idea what’s happening, in an underground cavern that’s slowly flooding due to the tides. We need to get out, and deal with the beasties we can hear rumbling around nearby. There’s a key on our location, though we’re not sure what it’s for yet. To take it it we’ll need to find two clues, which will also take us a third of the way to completing Act 1. We also know that the keys themselves are pretty horrific since we risk taking horror when holding them and drawing a v token from the bag.

There’s no immediate danger so we can do some setup. Mateo plays
[Clairvoyance]
and then investigates, committing
[Book of Psalms]
and
[Ward of Radiance]
, since they are of little use at the moment. z. Ok, well it is a shame to use Mateo’s superpower so early in the scenario, but it’s such a tempo swing it has to be done. From the Elder Sign we’re going to draw a card (another
[Ward of Radiance]
) and gain a resource. We succeed, so get the two clues and take control of ‘a piece of amber in the shape of a fish’s heart, that whispers something alien when you hold it’. Revealing a new location as a final action could be bad, so we’re going to draw, hoping for
[Keep Faith]
but finding another
[Clairvoyance]
instead.
McGlen plays his
[.45 Automatic]
, gains a resource, and plays the
[Luger P08]
. Castaigne will have to wait, guns are more important for Michael right now.
Upkeep
Mateo draws
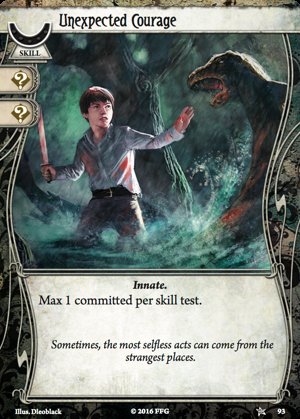
[Unexpected Courage]
 and McGlen draws
[Guts]
. Both could help with the upcoming…
and McGlen draws
[Guts]
. Both could help with the upcoming…
Round 2
Mythos
Two
[Swarm of Rats]
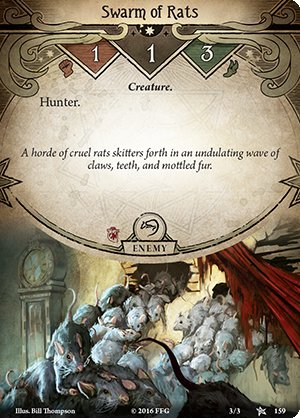 ! Note that this is two separate swarms of rats, not one huge swarm of rats! Important distinction. There be rats in these tunnels, but what are they running from and where are they going, other than up Mateo’s trousers?
Investigators
McGlen’s five d (he actually has F I V E tattooed on the fingers of his clenched fist) makes it unnecessary to spend any ammo dispatching the swarms. He rolls once, he rolls twice, and by magic the rats are dispatched. He then explores the eastern tidal tunnel, revealing an
[Underground River]
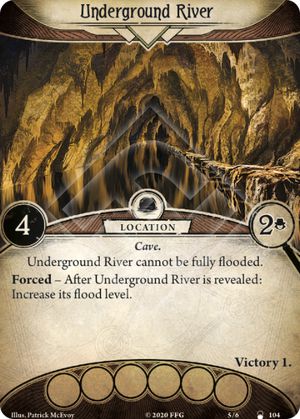 . Lots of clues and a victory point, but not the easiest for Mateo to investigate right now.
Mateo wouldn’t be much of a priest if he abandoned his brother at the first sign of hardship, so he follows Michael into the underground river. Clearing the clues is potentially two activations of
[Clairvoyance]
, though some commits will be needed. Thankfully, with his
[Unexpected Courage]
and Michael’s
[Guts]
, we have options. +2 is a 14/20 chance, while +3 is 17/20. For the first investigate, Mateo goes +3 and reveals… +1! That’s two clues but also one horror from Clairvoyance as Mateo glimpses slightly more than he intended… Once more, Mateo investigates at +3, committing
[Hand of Fate]
in addition to McGlen’s
[Guts]
. That’s a skull, so -2 and another successful investigate. Michael draws
[Pilfer]
off the
[Guts]
, and we have enough clues to advance, though we’ll wait until the start of the next investigator phase to do so.
Upkeep
McGlen draws
[Remington Model 1858]
, which might be helpful in dispatching Mateo’s new friend,
[Serpents of Yig]
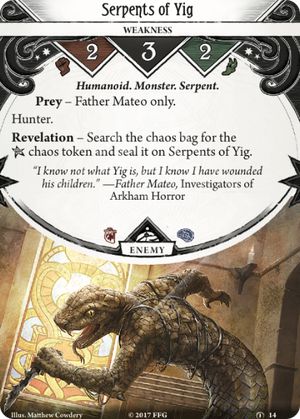 . I guess it’s not just servants of Dagon we’re fighting down here, but manifestations of Mateo’s past as well.
Round 3
Mythos
The mythos throws two sticky treacheries at us. Mateo foolishly decides to wade into the river (maybe following the alien whispers of the amber fish heart) and gets pulled under by the
[Undertow]
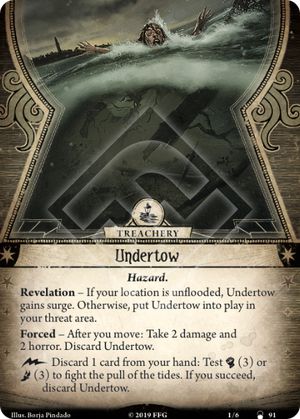 . Michael thinks he can make out singular cyclopean structures in the cavernous depths, his
[Dreams of R’lyeh]
. Michael thinks he can make out singular cyclopean structures in the cavernous depths, his
[Dreams of R’lyeh]
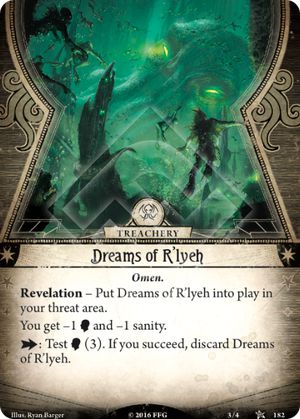 affecting his willpower and sanity.
Investigators
Assaulted by the currents and his serpentine friend, Mateo is not in a state to act. McGlen to the rescue! Escaping from his daydream, he takes aim with his
[.45 Automatic]
and
[Luger P08]
. Michael has not forgotten the face of his father, and downs the monster in a one-two salvo, costing only one action and gaining two resources in the process. The Luger has its uses! A two against three test on
[Dreams of R’lyeh]
seems unwise so it seems these dreams will be recurrent for now. With the loot dropped by the serpent, Michael can afford the services of
[Robert Castaigne]
, but first we will advance the act by spending the six clues on Father Mateo.
Wow, a lot has just happened, and our decision to delay the advance was vindicated.
- We have a big bad to replace the serpent that Michael just offed.
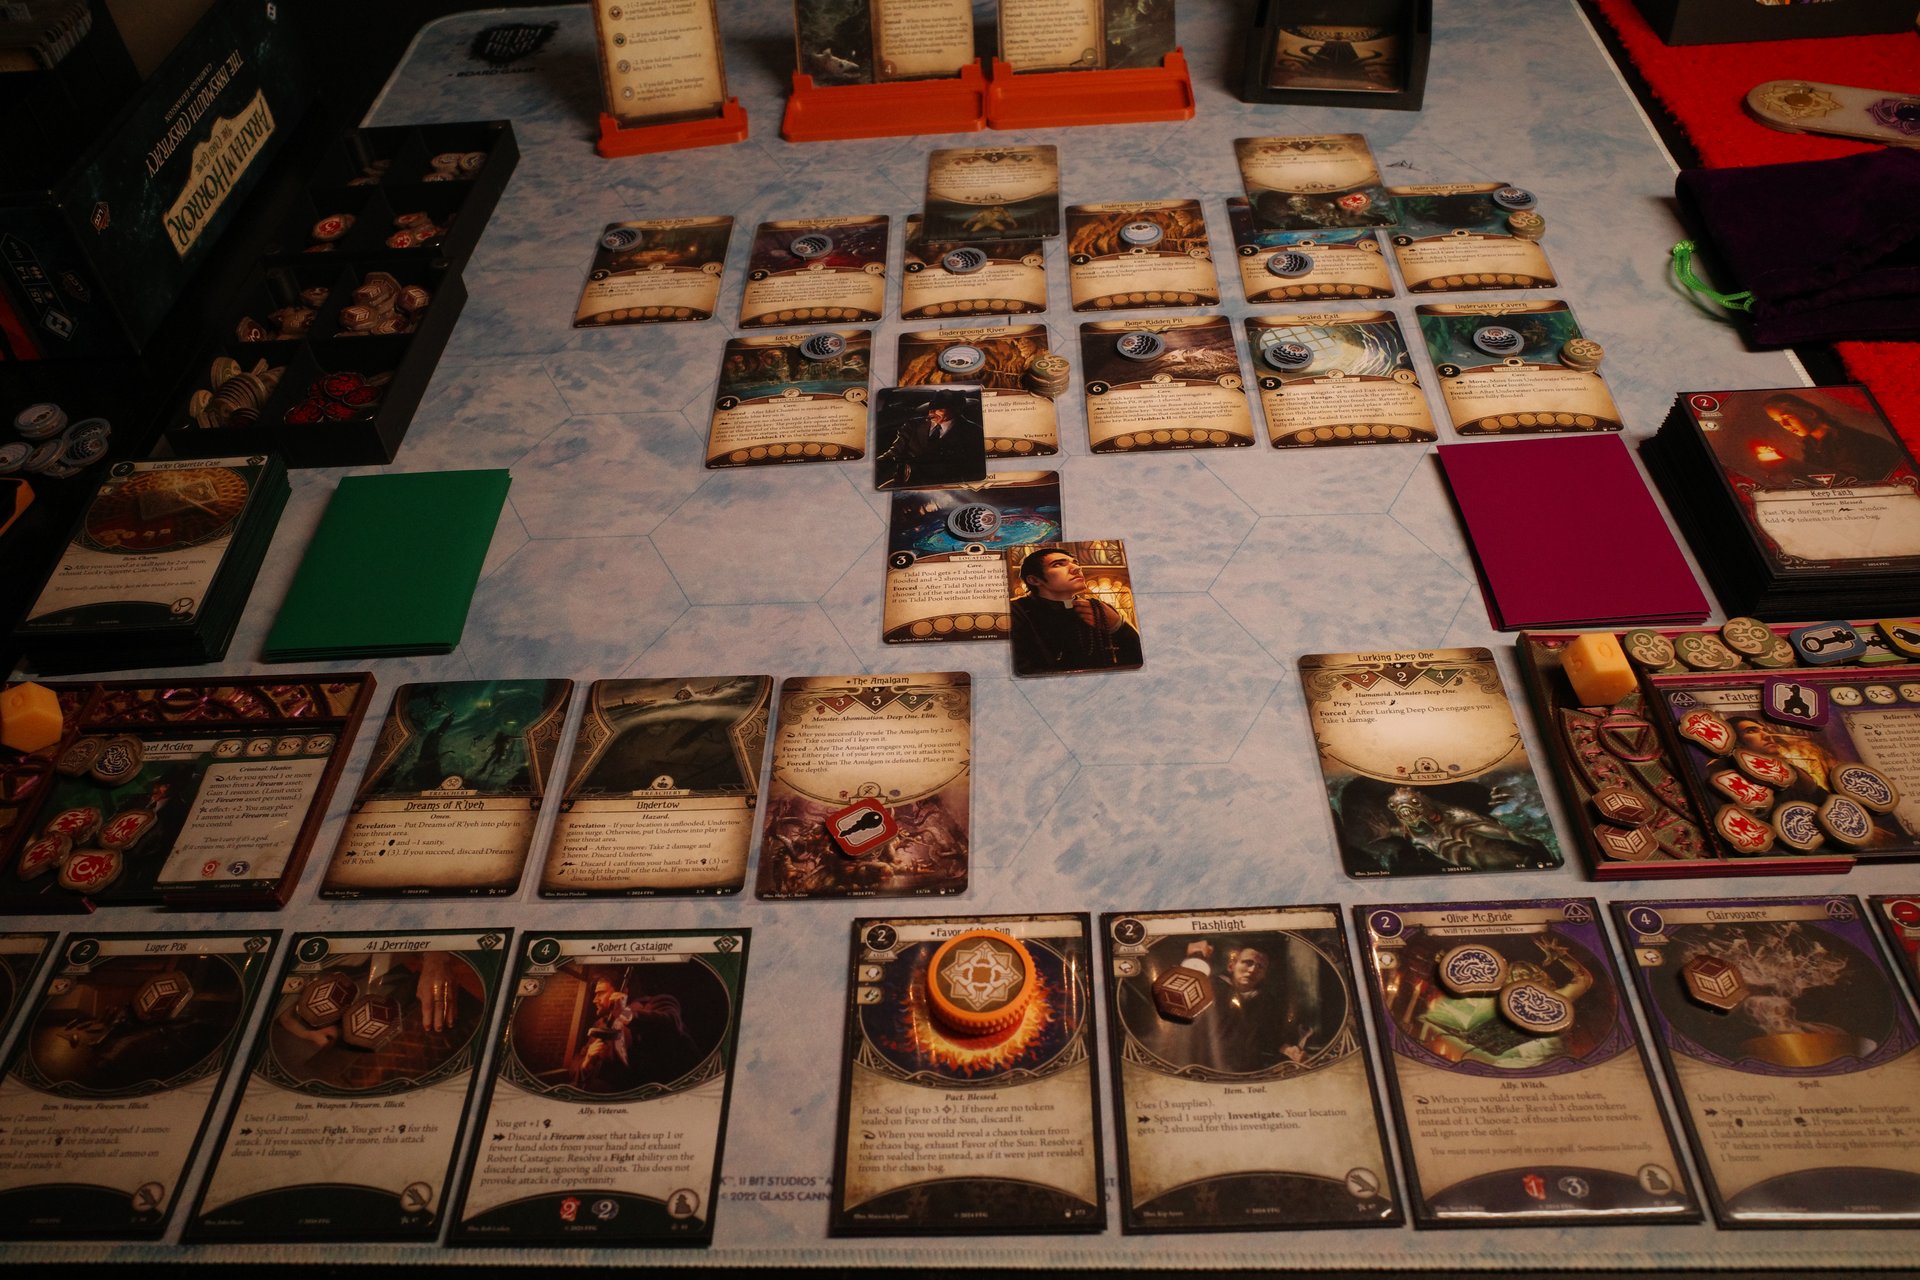
[The Amalgam]
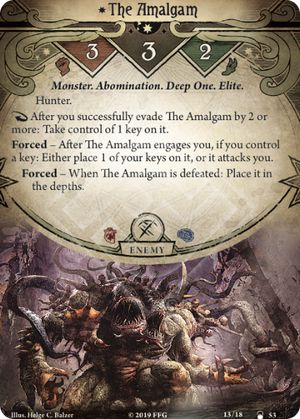 is a huge deep one abomination and it’s on top of Mateo. The Good Father just can’t catch a break!
 - We’ve discovered additional passageways through the caverns, unblocking progress further into the depths. One of these locations should have the means of escape.
- We gained insight into our past and what led us here. We’re investigating the disappearance of Elina Harper, an agent under a WW1 veteran called Thomas Dawson. She was last known investigating the mysterious town of Innsmouth. We don’t know our motives for helping Agent Dawson yet, it can be assumed they are not purely financial as that doesn’t seem becoming of a priest like Mateo. Perhaps a sort of penance for Michael’s sins? In any case, the flashback ends as Dawson’s face merges with one of many faces grafted onto The Amalgam. Was this Dawson’s fate or just a delusion of madness? In any case, we have more pressing concerns…
[The Amalgam]
has Mateo’s key and also has him pinned in the river. Thankfully McGlen has two actions remaining. The abomination is not difficult to scare away, but can be assumed to re-appear at the most inconvenient time. With pinpoint accuracy (and the Elder Sign), McGlen places a .45 directly in (one of) The Amalgam’s heads, which has it rearing back in pain. While it’s staggered, Michael finishes with a punch into the gyrating mass of flesh and tentacles, managing to
[Overpower]
the abomination and sent it shuffling back into the depths. In a bout of
[Paranoia]
, Michael believes he’s being assaulted from all directions and loses all his resources before the delusion fades. Castaigne will have to wait a while longer…
With his actions spent, Michael triggers the fast action on
[Undertow]
to try and grab Mateo before he’s fully taken by the tide. He discards
[Pilfer]
and pulls a -1, successfully pulling Mateo onto dry (ish) land.
Shaking off the cold and catching his breath, Mateo spends his turn drawing, in an attempt to find ways of adding bless to the chaos bag. First is
[Enraptured]
, which might prove valuable getting
[Clairvoyance]
back online. Next is
[Olive McBride]
, and third is
[Guts]
. Could have been worse but not what we were looking for.
Upkeep
Michael draws another
[“You’ve had Worse…”]
which is mostly commit-fodder at the moment, while Mateo draws his second weakness,
[Day of Reckoning]
. At least that’s both out of the way now, but not great to be without the Elder Sign for four rounds.
Round 4
Mythos
The Mythos gifts Mateo with a
[Young Deep One]
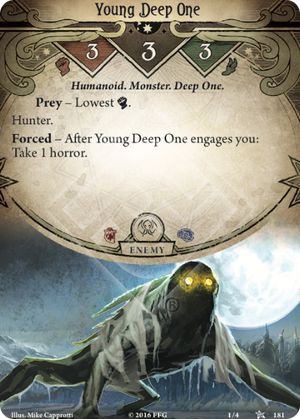 (along with a horror), and Michael a second
[Dreams of R’lyeh]
. Those dreams are getting pretty intense right now, giving Michael 1 willpower and 3 sanity, which is a bit much to ignore. Mateo will probably have to provide an intervention.
(along with a horror), and Michael a second
[Dreams of R’lyeh]
. Those dreams are getting pretty intense right now, giving Michael 1 willpower and 3 sanity, which is a bit much to ignore. Mateo will probably have to provide an intervention.
First things first, Michael takes aim at the deep one and pulls the v, dealing two damage, before going in for the finish with the Luger, pulling the b this time. The
[Young Deep One]
collapses back into the river from whence it came. The Luger will need to be reloaded at some point, but Michael decides to save the resources for Castaigne, in-fact he spends his last two actions getting more resources.
Mateo still wants to draw into some bless cards, and committing
[Guts]
into Michael’s
[Dreams of R’lyeh]
is one way to do so. He succeeds and draws
[Favor of the Sun]
, which will complete the combo with
[Ancient Covenant]
but unfortunately still doesn’t actually provide bless tokens! With two more draws, he finds
[Arcane Studies]
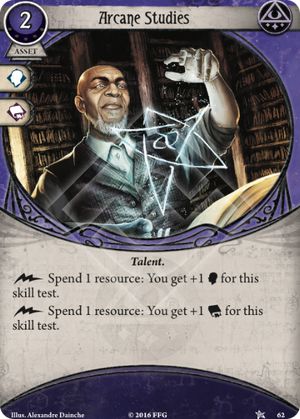 which will be useful with the resources he’s been accumulating, and
[The Codex of Ages]
which will be useful with the resources he’s been accumulating, and
[The Codex of Ages]
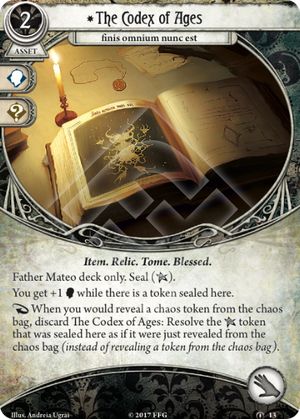 , which has me checking whether the Elder Sign currently sealed on
[Day of Reckoning]
can be re-sealed on the Codex… Turns out it cannot, which is a shame.
, which has me checking whether the Elder Sign currently sealed on
[Day of Reckoning]
can be re-sealed on the Codex… Turns out it cannot, which is a shame.
Upkeep
We’ve been at this underground river for too long, we need to move next round come rain or shine (and I’m pretty sure which of those we’re gonna get). Mateo draws
[Unexpected Courage]
, and is at the hand limit of 8, while Michael draws
[“Where’s the Party?”]
(spoiler, it’s in the underground river and Michael has been ‘killing it’.) On the upside, things are looking pretty calm right now, and unless something drastic happens in the mythos phase, we should be good to continue progressing the scenario next round…
Round 5
Mateo:
[Clairvoyance]
[Rite of Sanctification]
[Enraptured]
[Olive McBride]
[Favor of the Sun]
[Arcane Studies]
[The Codex of Ages]
Michael:
[Robert Castaigne]
[Remington Model 1858]
[“You’ve had Worse…”]
[“Where’s the Party?”]
Mythos
You know when I just said unless something dramatic happens in the mythos phase. Yeah. Mateo pulls an c from the bag while testing
[Macabre Memento]
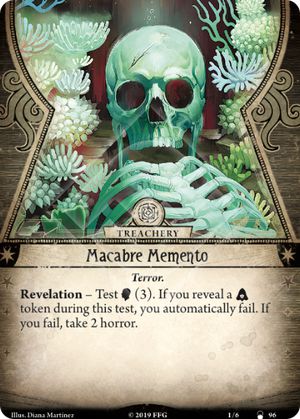 , failing by 1, taking two horror and retrieving
[The Amalgam]
from the depths. Yay. McGlen draws
[Memory of Oblivion]
, failing by 1, taking two horror and retrieving
[The Amalgam]
from the depths. Yay. McGlen draws
[Memory of Oblivion]
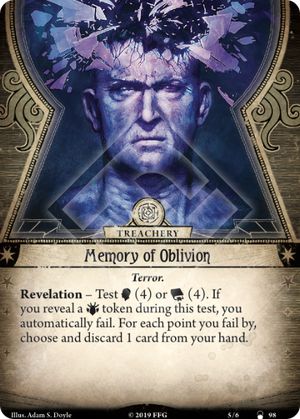 and tests two against four. Mateo helps out with some
[Unexpected Courage]
. McGlen pulls the autofail, discarding his entire hand.
and tests two against four. Mateo helps out with some
[Unexpected Courage]
. McGlen pulls the autofail, discarding his entire hand.
Investigators
Michael unloads once again into the abomination, first action whiffing with a -4 token, second one barely succeeding with a -3. That’s the .45 empty and still one health remaining. Michael quickly reloads the
[Luger P08]
before firing off a shot and scraping
[The Amalgam]
enough to have it tottering off back to the depths. Learning point: Never test at less than +3!
Mateo knows we can’t afford to delay any longer, so he explores further east, revealing
[Tidal Pool]
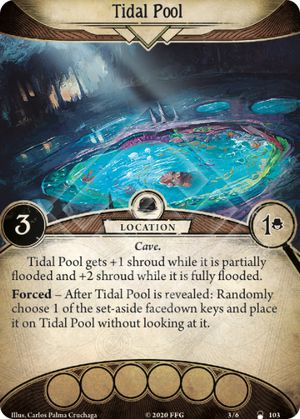 and putting two set aside tidal tunnels east and south of it. It has two clues, and a key. Mateo will want to investigate this fast before it gets flooded. To that end, out comes the second
[Clairvoyance]
for four of Mateo’s six resources, and immediately uses it to investigate. At least having the Elder Sign sealed means a lower chance of taking 1 horror from Clairvoyance! Swings and roundabouts. Mateo commits
[The Codex of Ages]
to go +3, and pulls a -2, success! Two clues and a key, which this time is ‘a calcified piece of chitin in the shape of a tentacle’. Sexy.
and putting two set aside tidal tunnels east and south of it. It has two clues, and a key. Mateo will want to investigate this fast before it gets flooded. To that end, out comes the second
[Clairvoyance]
for four of Mateo’s six resources, and immediately uses it to investigate. At least having the Elder Sign sealed means a lower chance of taking 1 horror from Clairvoyance! Swings and roundabouts. Mateo commits
[The Codex of Ages]
to go +3, and pulls a -2, success! Two clues and a key, which this time is ‘a calcified piece of chitin in the shape of a tentacle’. Sexy.
Upkeep
Mateo draws
[Ward of Protection]
and Michael draws
[Bum’s Rush]
, which could be especially useful for a big non-hunter enemy.
Round 6
Mythos
Two rounds before the agenda advances, and we get the Elder Sign back. Here’s hoping we can make some decent progress towards finding the exit, unless the mythos says nope again. Speaking of which, the mythos says
[From the Depths]
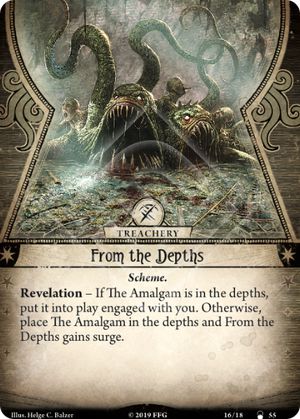 to Mateo, and Mateo says fuck you six ways to Sunday with
[Ward of Protection]
. Gosh, that felt good, though Mateo’s sanity isn’t looking too great with five horror. Thankfully we can play Olive soon to give the priest some respite.
to Mateo, and Mateo says fuck you six ways to Sunday with
[Ward of Protection]
. Gosh, that felt good, though Mateo’s sanity isn’t looking too great with five horror. Thankfully we can play Olive soon to give the priest some respite.
Unfortunately, Michael draws
[Blindsense]
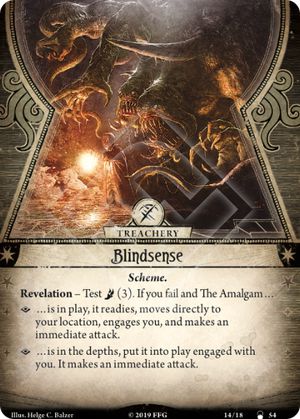 and without any cards to commit for agility, is reliant on drawing a 0 or +1 to prevent a third encounter with
[The Amalgam]
. It really doesn’t want to accept defeat at the battle of underground river, does it? However, by some stroke of luck or sheer force of will, Michael does pull a 0 and The Amalgam remains in the depths.
and without any cards to commit for agility, is reliant on drawing a 0 or +1 to prevent a third encounter with
[The Amalgam]
. It really doesn’t want to accept defeat at the battle of underground river, does it? However, by some stroke of luck or sheer force of will, Michael does pull a 0 and The Amalgam remains in the depths.

Investigators
Finally we have a round of relative calm. Mateo will push even further east to reveal an
[Underwater Cavern]
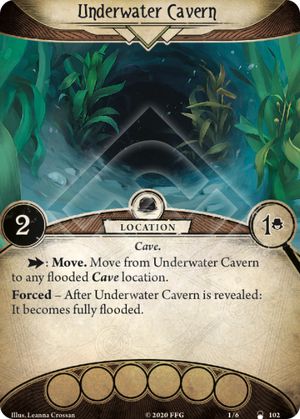 , coming into play with two clues and a full flood token. Mateo will have to leave by the end of the next round or take five damage, but there’s no need to stick around. The final tidal tunnel can enter play to the south, which creates an efficient path back to other unrevealed locations, with no backtracking. Given no immediate need for the clues on the underwater cavern, Mateo immediately explores south, revealing another
[Underwater Cavern]
. There’s the option of using the >Move here to teleport back to McGlen (presumably riding the current like tube at a water park), but this is less efficient for revealing all the locations, which we want to do, so Mateo makes one final move east, revealing…
[Sealed Exit]
, coming into play with two clues and a full flood token. Mateo will have to leave by the end of the next round or take five damage, but there’s no need to stick around. The final tidal tunnel can enter play to the south, which creates an efficient path back to other unrevealed locations, with no backtracking. Given no immediate need for the clues on the underwater cavern, Mateo immediately explores south, revealing another
[Underwater Cavern]
. There’s the option of using the >Move here to teleport back to McGlen (presumably riding the current like tube at a water park), but this is less efficient for revealing all the locations, which we want to do, so Mateo makes one final move east, revealing…
[Sealed Exit]
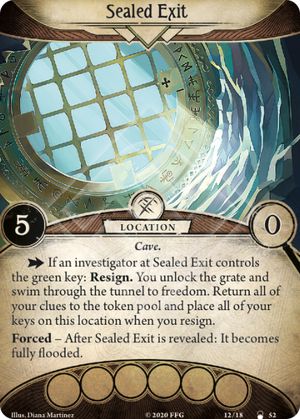 !
!
It can’t be used yet though, as we need to find the green key to unlock the grate. Unfortunately, the
[Underwater Cavern]
could have provided a quick route back to the exit if they were better positions. I also realised I probably should have played
[Olive McBride]
for soak instead of moving. Mateo will have to survive one more mythos phase without her.
Meanwhile, Michal is getting pretty sick with the motherfucking abominations in this motherfucking
[Underground River]
, and wants to get the hell out of dodge. He’ll move south to reveal
[Bone-ridden Pit]
 , which hardly sounds much better. It does however lead to another flashback, given we discover the clues and posess the yellow key, which we do. It’s a mighty six shroud but will be reduced to four if both Mateo and Michael bring their respective keys, which is more doable but still rough. Michael is in desperate need of a new gun after dropping them all while recounting his
[Memory of Oblivion]
a few rounds ago (kids, never remember oblivion!) So he draws into
[“Viola” Case]
and then plays it. The extra hand slots are not very useful, but the search is very useful right now. Unfortunately he doesn’t have any remaining actions to play the
[.18 Derringer]
he found (the choice was between that and the
[.41 Derringer]
, it seemed better to take the guaranteed +1 damage over the extra ammo).
, which hardly sounds much better. It does however lead to another flashback, given we discover the clues and posess the yellow key, which we do. It’s a mighty six shroud but will be reduced to four if both Mateo and Michael bring their respective keys, which is more doable but still rough. Michael is in desperate need of a new gun after dropping them all while recounting his
[Memory of Oblivion]
a few rounds ago (kids, never remember oblivion!) So he draws into
[“Viola” Case]
and then plays it. The extra hand slots are not very useful, but the search is very useful right now. Unfortunately he doesn’t have any remaining actions to play the
[.18 Derringer]
he found (the choice was between that and the
[.41 Derringer]
, it seemed better to take the guaranteed +1 damage over the extra ammo).
Upkeep
Both draw
[Guts]
.
Round 7
Mythos
[Rising Tides]
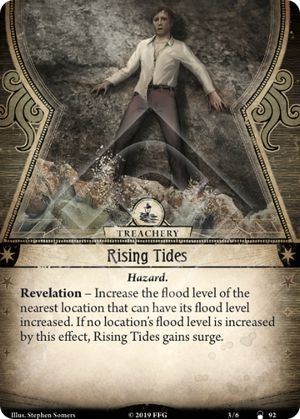 causes an inconsequential flood level increase to the
[Tidal Pool]
we’ve already visited. Michael draws
[Fractured Consciousness]
causes an inconsequential flood level increase to the
[Tidal Pool]
we’ve already visited. Michael draws
[Fractured Consciousness]
 . He can shrug off the two damage, the only risk is pulling the c token and spawning
[The Amalgam]
, but there’s nothing we can do to raise his paltry intelligence, so we just have to hope for the best. We draw a -2. Note to self:
[Olive McBride]
is useful to avoid the c in a test that is otherwise unpassable.
. He can shrug off the two damage, the only risk is pulling the c token and spawning
[The Amalgam]
, but there’s nothing we can do to raise his paltry intelligence, so we just have to hope for the best. We draw a -2. Note to self:
[Olive McBride]
is useful to avoid the c in a test that is otherwise unpassable.
Investigators
Father Mateo swims to be reunited with Michael (and his guns). This puts the shroud at four and with the
[Guts]
we just draw, we should be able to clear this location and unlock the second flashback. Before forgetting, Mateo plays
[Olive McBride]
and then investigates with
[Clairvoyance]
. This is am important test so we’re going to throw a lot at it. Michael and Mateo both commit
[Guts]
, giving +4. Mateo commits
[Favor of the Sun]
, since it seems we’re never going to get any bless tokens in the bag this scenario. He then uses
[Olive McBride]
to draw three tokens and resolve two of them. The odds of failure without Olive are 1/19 (the autofail), and the odds of failure with Olive would require lots of math to determine but basically would mean drawing the autofail, and some combination of tokens that results in -6 or less, which my gut says is rarer than 1/19. Mateo draws +1, -3, -2, which is a solid pass. We can actually resolve the -3 and -2 and still pass, avoiding the horror we’d have got resolving the +1. Mateo draws
[Enraptured]
and Michael draws another
[.18 Derringer]
. Mateo will need to find some low shroud locations to investigate with intelligence, so
[Enraptured]
can put some charges back onto
[Clairvoyance]
. Finally, we get the two clues and flashback two.
The bones we’re stood on jog a memory of fighting some enormous aquatic creature while trying to escape in a fishing vessel. For anyone familiar with The Call of Cthulhu story, that should seem terrifyingly familiar. We get to remove a b token from the bag, which doesn’t help much with this scenario, we’d have much preferred removing the c.
Michael unholsters his
[.18 Derringer]
. Thanks to
[“Viola” Case]
, he doesn’t have to discard the .45, and while it doesn’t have any ammo anymore, if Michael draws his weakness it will get shuffled back into the deck instead of being discarded. He then moves east and reveals the second
[Underground River]
. It would be nice to get the victory here but it’s not the highest priority. Not wanting to get too far from Mateo, he stays put and takes a resource.
Upkeep
Mateo draws
[Flashlight]
which will help enable
[Enraptured]
, while Michael draws a second
[Bum’s Rush]
.
Round 8
Mythos
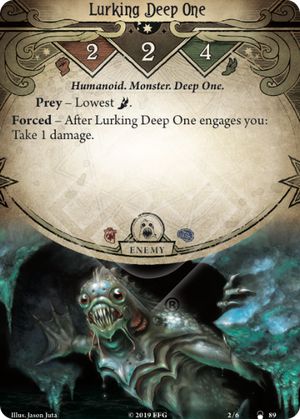
The agenda flips, we get the Elder Sign back, and presumably bad stuff will happen. Ah yes. Bad stuff did happen. Everywhere is flooded, and half the locations are fully flooded. Thankfully, the the new agenda has 8 doom threshold which feels like enough to see out the rest of the locations (though we know how optimism is punished in Arkham Horror). Mateo draws
[Lurking Deep One]
 taking a damage in the engage, and Michael draws
[Riptide]
taking a damage in the engage, and Michael draws
[Riptide]
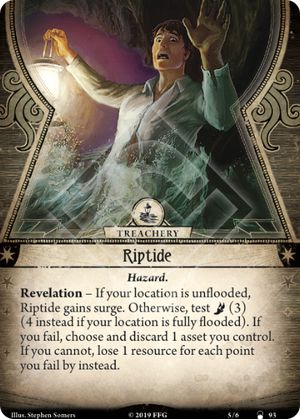 , which is totally fine because Michael has plenty of guns to discard. Turns out, it’s not fine as he pulls the c and
[The Amalgam]
is back! The .45 is lost to the riptide but that’s no biggie (unlike the monstrosity that just appeared).
, which is totally fine because Michael has plenty of guns to discard. Turns out, it’s not fine as he pulls the c and
[The Amalgam]
is back! The .45 is lost to the riptide but that’s no biggie (unlike the monstrosity that just appeared).
Investigators
Michael has a bit of a problem now. He’s on a fully flooded location (editor note: this was a mistake, the location can’t be fully flooded. I fix this in a few rounds), so can’t end his turn on another fully flooded location (well, he could survive with 2 health remaining but that seems bad). Ideally
[The Amalgam]
dies in two hits (one action because of the Luger), then he moves back to the
[Bone-ridden Pit]
to use his final action saving Mateo from the
[Lurking Deep One]
. That’s a lot of tests that need to succeed though! This seems like a good opportunity to use a
[Bum’s Rush]
. Michael tests 8 vs 2 and succeeds by four, stealing back the key, dealing a damage, and exhausting the abomination. Unfortunately since it’s elite, it can’t be shoved somewhere else. Michael then moves to Mateo and shoots the deep one with the .18. He pulls an c, but this time it’s still a success and Mateo is free again, and Michael gets a resource for his trouble.
Mateo moves west twice, since he started in a partially flooded location he can afford to end in a fully flooded one. Passing the disorientated abomination in the underground river, he reveals the
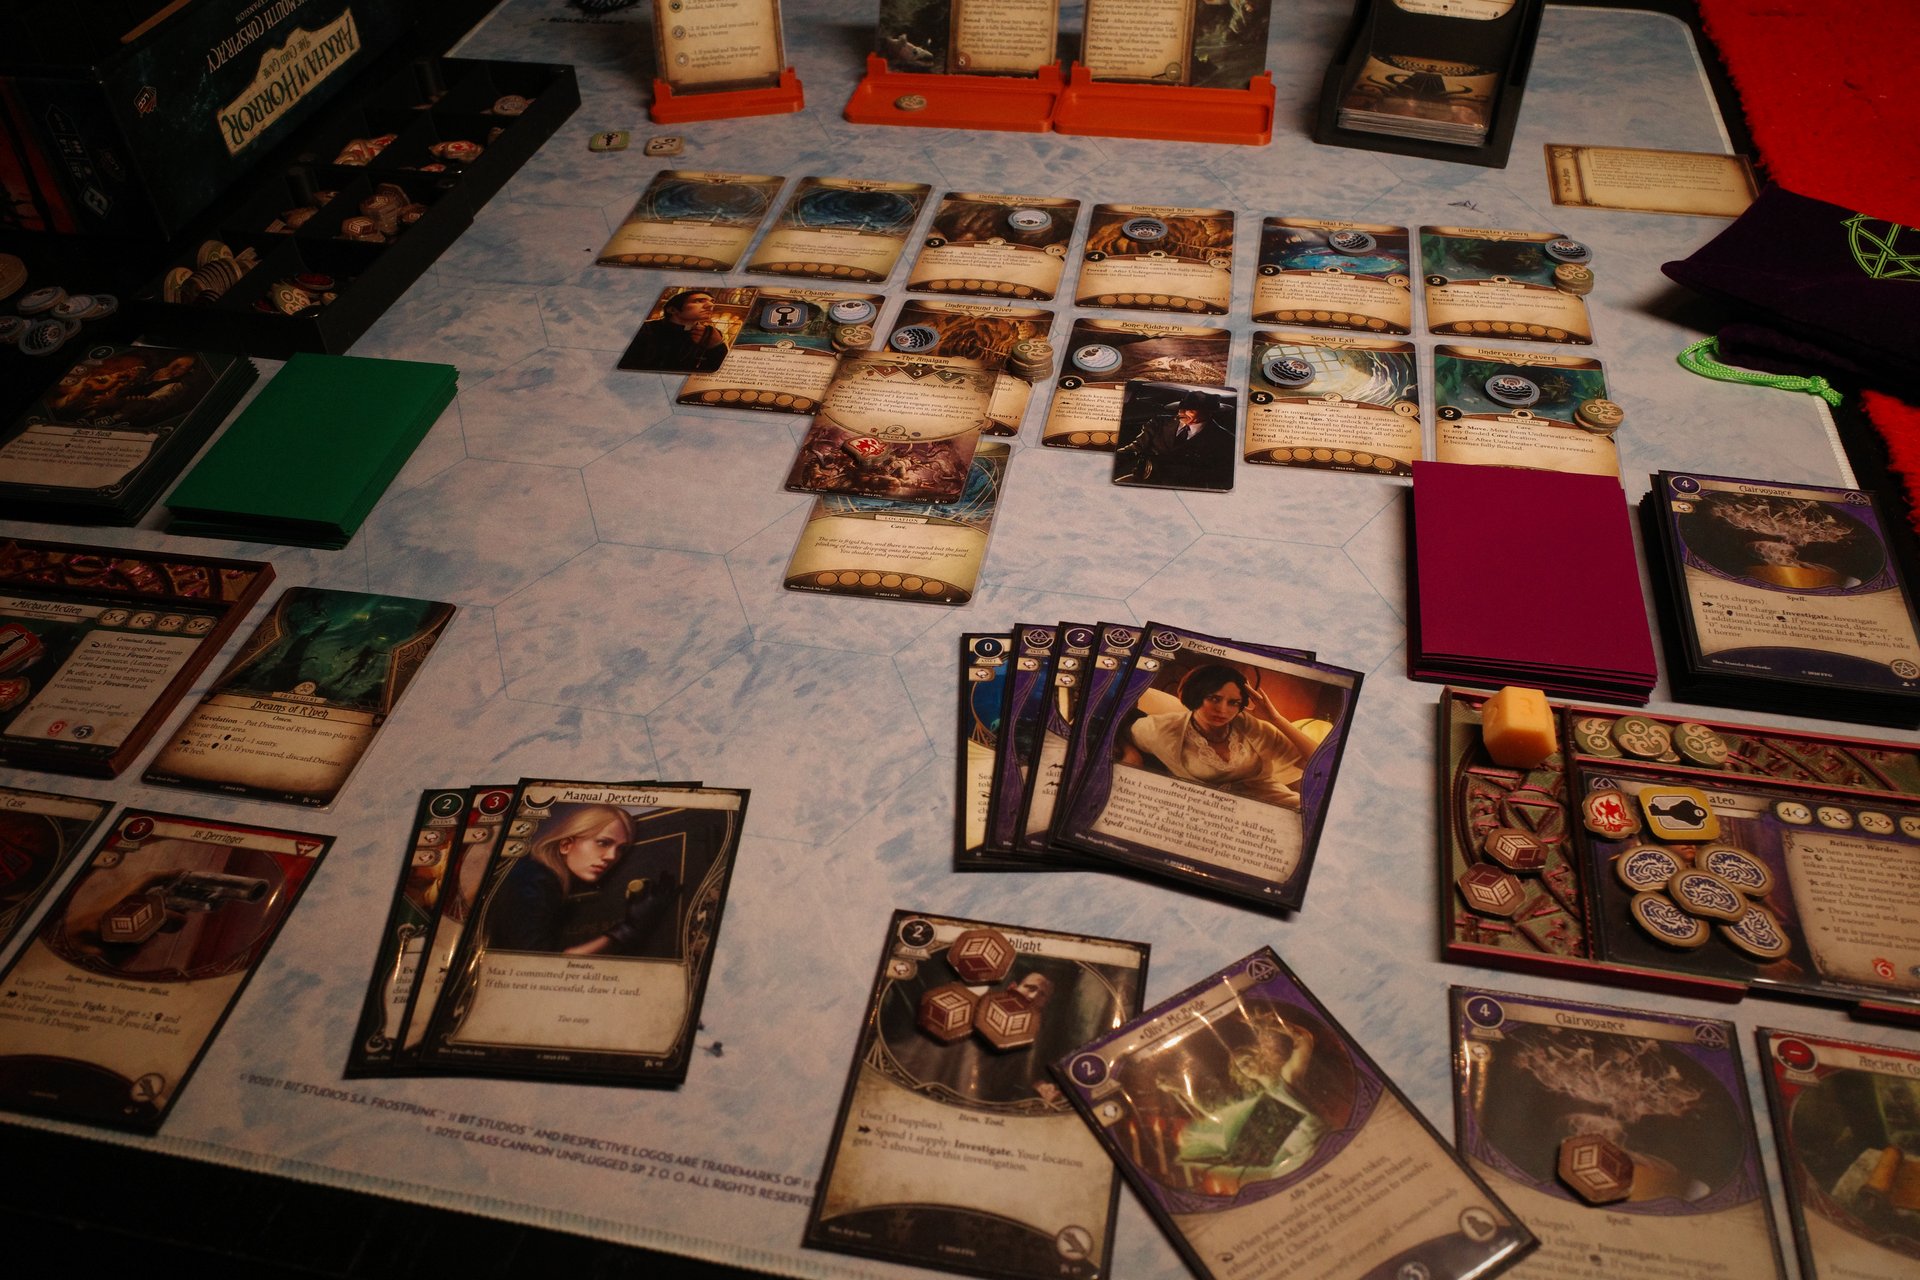
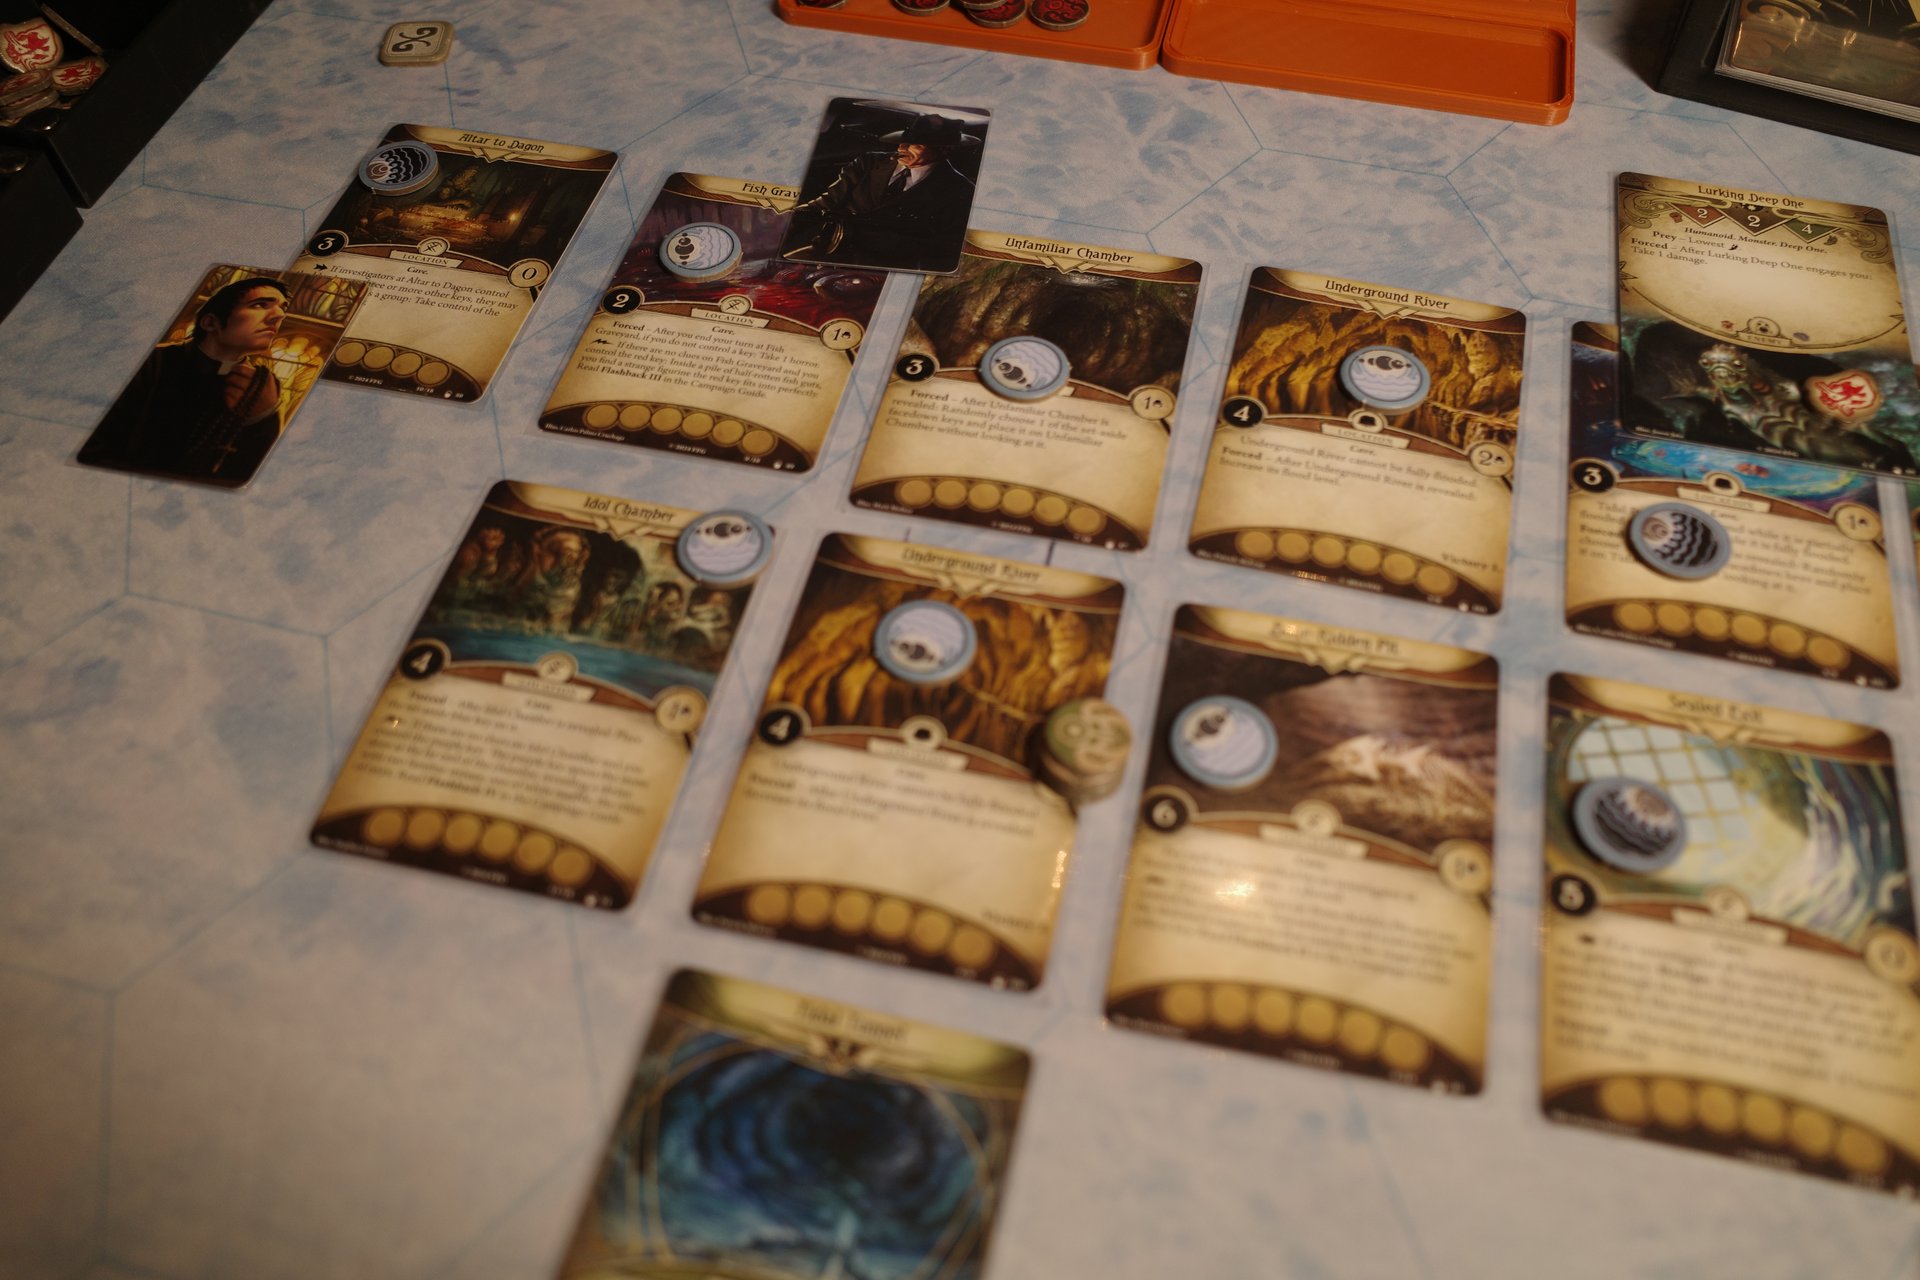
[Idol Chamber]
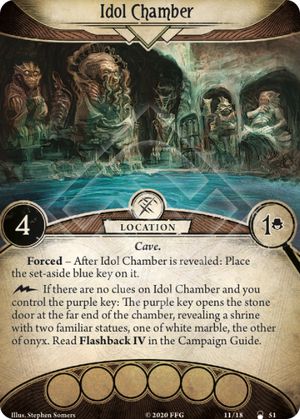 , which gives access to the fourth flashback with the purple key, which we haven’t found yet. Mateo then plays a
[Flashlight]
.
, which gives access to the fourth flashback with the purple key, which we haven’t found yet. Mateo then plays a
[Flashlight]
.
Upkeep
[The Amalgam]
readies, Mateo draws
[Prescient]
, and Michael draws
[Manual Dexterity]
.
Round 9
Mateo:
[Rite of Sanctification]
[Enraptured]
[Enraptured]
[Arcane Studies]
[Prescient]
Michael:
[Bum’s Rush]
[.18 Derringer]
[Manual Dexterity]
Mythos
Mateo draws
[Riptide]
. He’s not worried about losing the empty
[Clairvoyance]
, but will activate Olive to potentially avoid a b (1 damage), or v (1 horror). Michael draws another
[Fractured Consciousness]
and takes another two damage.
Investigators
There are three unrevealed locations left, and we still need the green key, purple key, and two flashbacks. The
[Idol Chamber]
requires the purple key to unlock flashback four. The green key is required to escape. The yellow key was used in
[Bone-ridden Pit]
. So, one location will require the red key for flashback three, and the other two locations will contain the purple and green key.
Mateo moves north and reveals
[Fish Graveyard]
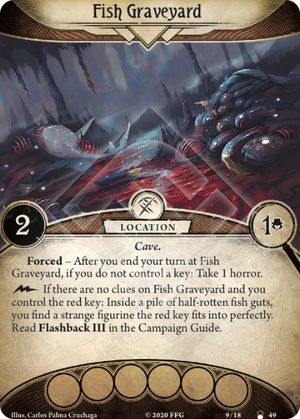 (“Dr. Fishy! Noooooo!”) We control a key so don’t take horror, and this is a two shroud location which is perfect with
[Flashlight]
and
[Enraptured]
. Unfortunately we used Olive in the mythos phase so we can’t guarantee the investigate. We commit
[Enraptured]
and succeed, putting a charge on
[Clairvoyance]
and gaining one of the two clues. Repeat once more with the second
[Enraptured]
, succeed and get the final clue. Unfortunately Michael has the red key so we’ll have to wait for him to unlock the third flashback, and he has bigger fish to fry right now. SPEAKING OF BIG FISH.
(“Dr. Fishy! Noooooo!”) We control a key so don’t take horror, and this is a two shroud location which is perfect with
[Flashlight]
and
[Enraptured]
. Unfortunately we used Olive in the mythos phase so we can’t guarantee the investigate. We commit
[Enraptured]
and succeed, putting a charge on
[Clairvoyance]
and gaining one of the two clues. Repeat once more with the second
[Enraptured]
, succeed and get the final clue. Unfortunately Michael has the red key so we’ll have to wait for him to unlock the third flashback, and he has bigger fish to fry right now. SPEAKING OF BIG FISH.
We’re going to take
[The Amalgam]
on a wild McGlen chase. Michael moves north, back to the
[Underground River]
which is fully flooded, but that’s not a problem since we started on a partially flooded location. He’ll then draw some cards. There’s a risk of getting his weapons confiscated by the fish police but better now than when we really needed them. Ends up drawing
[.41 Derringer]
and
[Luger P08]
. We really need our friend
[Robert Castaigne]
with all these guns in hand.
Enemies
During the enemy phase (oh yeah, I’d forgotten what having to do something during one of these was like),
[The Amalgam]
hunts towards McGlen, moving to the bone pit, which puts it out of harms way for a few turns.
Upkeep
Mateo then finally draws
[Keep Faith]
and Michael, as baited, draws
[Confiscation]
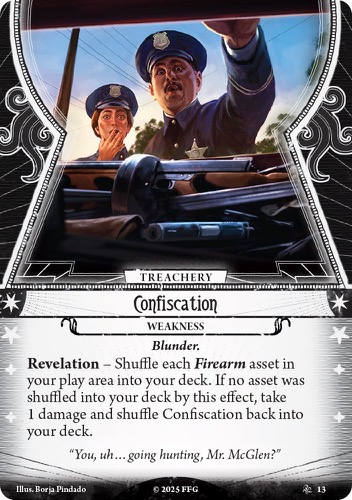 . Michael is feeling prety naked right now, but thankfully there are plenty of guns in hand to play. The only risk now is drawing an enemy in the…
Round 10
Mythos
Mateo draws
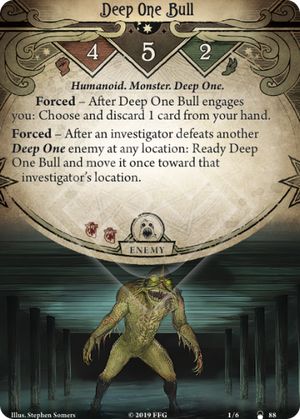
[Deep One Bull]
 (discarding
[Rite of Sanctification]
) and Michael draws
[Deep One Assault]
(discarding
[Rite of Sanctification]
) and Michael draws
[Deep One Assault]
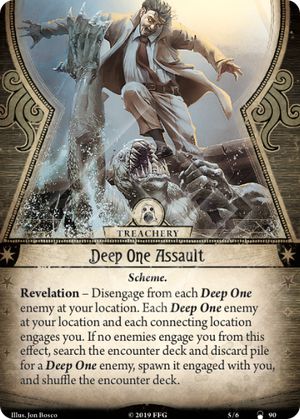 . So much for not drawing enemies huh. Unfortunately the bull is two locations away from Michael so the assault can’t draw the bull off Mateo, and another enemy has to be found from the encounter deck. At least we get to choose a
[Lurking Deep One]
, which deals a damage as it engages but can be neutered with a single
[Bum’s Rush]
.
. So much for not drawing enemies huh. Unfortunately the bull is two locations away from Michael so the assault can’t draw the bull off Mateo, and another enemy has to be found from the encounter deck. At least we get to choose a
[Lurking Deep One]
, which deals a damage as it engages but can be neutered with a single
[Bum’s Rush]
.

Investigators
Michael, being two locations from Mateo, can’t deal with both his foe and Mateo’s, but if he ends up at Mateo’s location he has
[Manual Dexterity]
to commit to an evasion test.
[Bum’s Rush]
succeeds by 3 so the
[Lurking Deep One]
gets punted into the tidal pool and Michael is free to move to Mateo.
Mateo plays
[Keep Faith]
, then attempts an evasion on
[Deep One Bull]
. With help from McGlen he’s +3. The quesion is, do we trigger
[Olive McBride]
? With
[Ancient Covenant]
, each bless token is a success, which gives a 2 in 24 chance to fail without Olive. With Olive we can only make an educated guess. If any of the three revealed tokens are bless, +1, or Elder Sign, it’s an auto success. Running some quick calculations, there’s a 42% chance of not finding one of those tokens, and if that happens, we’d need two tokens to be -1/-2 or better. My hunch says Olive puts us in a worse position, so we’re going to go without. We draw an c, passing by 0, evading the bull, and Michael draws another
[.41 Derringer]
.
With the immediate threat dealt with, the amber fish heart in the
[Fish Graveyard]
triggers something in Michael, and we get treated to the third flashback. Not much is revealed other than ominous portents, but we do remove another token, a v this time. Still not an c. Lets hope the fourth flashback provides.
Mateo moves west, revealing
[Altar to Dagon]
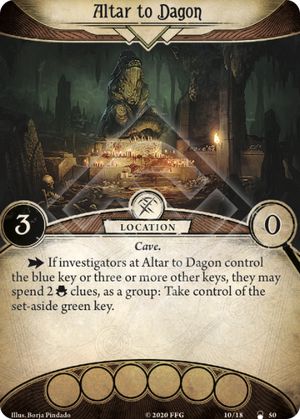 . I realise my mistake in not collecting the blue key when I was at its location. The backtracking will be painful, costing four actions in total. One positive is Mateo already has the four clues required once we do get back. Since there’s no point hanging around the altar with nothing to do, Mateo moves back to Michael as his last action.
Enemies
[The Amalgam]
hunts north to the
[Underground River]
.
Upkeep
During upkeep, the
[Lurking Deep One]
readies but won’t be a threat any longer since it doesn’t hunt.
[Deep One Bull]
readies and engages Mateo (discarding
[Olive McBride]
from hand), who can hopefully evade it until Michael gets a gun into play. Mateo draws
[Olive McBride]
and Michael draws
[Lucky Cigarette Case]
.
Round 11
Mythos
We’re at the mercy of the mythos here. Our board state is tenuous, with the
[Deep One Bull]
and no immediate way to deal with it, and
[The Amalgam]
on us in two rounds. Another enemy would be pretty disasterous. Mateo thus draws
[Young Deep One]
, taking a horror which Olive soaks. Michael draws
[Swarm of Rats]
which will cost us a valuable action to deal with. Not good.
Investigators
Michael punches the
[Swarm of Rats]
successfully, then plays
[Luger P08]
. The alternative is gaining a resource and paying something bigger like the
[.41 Derringer]
, but that would mean not having actions to fight and thus missing out on this round’s free trigger of Michael’s ability. Using the free Luger trigger, targetting the
[Young Deep One]
, Michael shoots and scores a damage, then follows up with a basic fight action, committing one of the
[.41 Derringer]
s to be +3, which also succeeds. Next round, the Luger can finish off the
[Young Deep One]
, giving enough resources to play
[.41 Derringer]
to fight the bull and abomination.
Mateo has some evading to do, and isn’t going to get much help in the form of commits. First, the
[Deep One Bull]
. I’m still not sure if Olive is beneficial here, testing at +1, but lets give her a go. We pull an c (-3), -3, and l.
[Ancient Covenant]
means we don’t have to draw another token after the l, so resolving that and a -3 means we pass by 0! The problem now is the
[Young Deep One]
which is a 3 vs 3 test, with no Olive or Covenant to help out. The risk of trying is a damage or horror from the b or v, though there is only one of each in the bag now. Lets go for it. b, that’s a fail and a damage. Again. A l, followed by… an c. That’s the worst case, removing a l and still failing. Oh well.
Enemies
[The Amalgam]
hunts, it’s now only one turn away.
Upkeep
Mateo takes one and one from the
[Young Deep One]
and is re-engaged by the
[Deep One Bull]
(discarding
[Arcane Studies]
this time). Mateo draws
[Holy Rosary]
and Michael draws
[Hard Knocks]
.
Round 12
Mateo:
[Arcane Studies]
[Prescient]
[Holy Rosary]
Michael:
[.18 Derringer]
[.41 Derringer]
[Lucky Cigarette Case]
[Hard Knocks]
Mythos
Four of eight doom, which leaves us four round before presumably everything is flooded. Mateo needs to stop evading and get the two keys required to escape, but that puts a lot of burden on Michael to deal with the three enemies, with potentially more incoming. But first, the mythos gifts Mateo yet another
[Swarm of Rats]
, and Michael yet another another
[Swarm of Rats]
. This is starting to look pretty dire.
Investigators
Michael uses the
[Luger P08]
to finish off the
[Young Deep One]
, before punching his own
[Swarm of Rats]
and playing
[.41 Derringer]
with the resource gained from the Luger. Finally, he punches Mateo’s rats.
This feels like a tipping point for the scenario now. If Mateo manages to evade the bull one more time, he can move to the
[Idol Chamber]
to get the key. This leaves Michael in a pricarious situation, but there’s not really another option. If the evade fails, we’re stuck here another round and it’s all but over. So, Mateo goes for the evade on
[Deep One Bull]
, and Michael commits
[Hard Knocks]
to make it +2. Mateo pulls a skull which is -2 and a pass! The bull is exhausted after being given the run-around, and Mateo legs it to the
[Idol Chamber]
and investigates using
[Clairvoyance]
. Committing his entire hand,
[Prescient]
(naming symbol) and
[Holy Rosary]
, he pulls a skull, which is a success and allows him to take
[Ward of Protection]
back into his hand. With the location cleared of clues, the blue key is free for the taking, which represents “an idol of a malformed aquatic creature”.
Enemies
[The Amalgam]
hunts into the
[Fish Graveyard]
, engaging and attacking Michael, and stealing his key. Then, the
[Deep One Bull]
readies and engages, causing Michael to discard
[Lucky Cigarette Case]
.
Upkeep
Mateo draws
[Holy Rosary]
and Michael draws a replacement
[Lucky Cigarette Case]
.
Round 13
Mythos
Mateo draws
[Deep One Assault]
and in the history of Arkham Horror, no encounter card has ever been cancelled as fast. Michael draws
[Memory of Oblivion]
which essentially means discarding his whole hand barring a miracle from the chaos bag. He pulls a -1 which is a failure by 2, and
[.18 Derringer]
and
[Lucky Cigarette Case]
are discarded.
Investigators
Mateo rushes through Michael and his two fishy buddies in the
[Fish Graveyard]
, entering the
[Altar to Dagon]
, before placing the aquatic statue on the altar and gaining the green key in return, “an emerald key with four prongs”.
Michael shoots
[The Amalgam]
with the
[.41 Derringer]
, pulls an c which means a glancing blow and only one damage. Going again, he pulls and elder sign, causing
[The Amalgam]
to retreat to the depths and putting an extra bullet on the Derringer. As his last action, he needs to evade the
[Deep One Bull]
or take two damage from it, leaving him on one health. With nothing to commit, there’s nothing for it but to pull… a l token, putting him at +3, followed by… an c, which is a success by 0! Pulling the c without the l would have been catastrophic, leading to the immediate return of
[The Amalgam]
, Michael’s death, and the blocking of Mateo’s escape.
Upkeep
After an un-eventful enemy phase for once, the bull re-engages on Michael and at least doesn’t cause a discard from Michael’s empty hand. Mateo draws his second
[Keep Faith]
, which could come in clutch, and Michael draws
[Robert Castaigne]
, though doesn’t have the freedom to play him yet.
Round 14
Mateo:
[Holy Rosary]
[Keep Faith]
Michael:
[Robert Castaigne]
Mythos
Six out of Eight doom. Mythos, Mateo draws
[Rising Tides]
which floods the
[Altar to Dagon]
which seems appropriate considering he just activated the altar and presumably triggered the ‘drown them before they can escape!’ trap. Michael draws
[Macabre Memento]
, which is no threat itself since Michael can take the horror, but the risk of drawing the c and bringing back
[The Amalgam]
is significant. Mateo, during the player window, will play
[Keep Faith]
which, albeit only slightly, reduces the odds of Michael failing with the c (he would have to draw 2xl followed by the c to succeed with it). Michael’s
[Dreams of R’lyeh]
means the test is two vs three, and losing would put him on one sanity. He pulls a -2.
Investigators
Mateo once again dashes past Michael and the
[Deep One Bull]
, entering the
[Underground River]
, which is a safe-haven since it can’t be fully flooded. Next round he has the option of attempting to grab the final purple key from the one remaining unrevealed location, then triggering flashback four. Though this seems particularly optimistic.
Michael can’t really hope to defeat the
[Deep One Bull]
without more firepower, so an evade is the only option. With 5xl in the bag, there’s a decent chance of success. First attempt, he pulls… a 0! Finally, things seem to be turning around. Michael then finally gets to leave the fishy graveyard and join Mateo in the underground river.
Upkeep
Mateo draws
[Favor of the Sun]
which might prove pivotal. Michael draws
[Overpower]
.
Round 15
Mythos
Mateo draws
[From the Depths]
, bringing
[The Amalgam]
back for, I’ve lost count, the fifth time now? This dude really doesn’t take no for an answer. Michael draws
[Undertow]
, which enters his threat area.
Investigators
Michael doesn’t need to move yet, so
[Undertow]
isn’t a bridge we need to cross right now. More important is freeing Mateo from
[The Amalgam]
so he can grab the purple key. He will finally play
[Robert Castaigne]
, providing some additional firepower and some potentially crucial soak. Then, he takes aim with the
[.41 Derringer]
at 8 vs 3, and pulls… a l token. Activating
[Ancient Covenant]
is an option here, since Mateo is at our location, but it seems unnecessary. A -3 follows, which means two damage to the abomination. As his final action, Michael spends the resource just gained to reload the
[Luger P08]
, before triggering the free fight ability. Another elder sign! That’s another ammo for the Derringer and
[The Amalgam]
defeated once more. Hopefully that’s the last we see of it.
[Deep One Bull]
does hear the engagement and moves closer.
Mateo explores south and reveals the second
[Tidal Pool]
. He plays
[Favor of the Sun]
, sealing three of the four l tokens on it. He then investigates with
[Clairvoyance]
, resolving a l sealed on
[Favor of the Sun]
, and triggering
[Ancient Covenant]
to prevent pulling another token. That’s the two clues and the key gained, which is ‘a jagged key of marble and onyx’.
Upkeep
Mateo draws
[Rite of Sanctification]
, and Michael draws
[Luger P08]
.
Round 16
Mateo:
[Holy Rosary]
[Rite of Sanctification]
Michael:
[Overpower]
[Luger P08]
Mythos
Eight of eight doom, the agenda advances. Everywhere becomes fully flooded, except the
[Underground River]
s which can’t be. Thankfully, we can utilise one of them as the last vestige of solid ground to grab the final flashback and then make our escape.
Mateo draws
[Lurking Deep One]
, taking a damage from the engage. Michael draws
[From the Depths]
. Unbelievable, there really is no end to it.
Investigators
Mateo begins by evading the
[Lurking Deep One]
, using the same combo of
[Favor of the Sun]
and
[Ancient Covenant]
to guarantee success. He then moves back to the underground river. Without enough actions to move into the
[Idol Chamber]
and back, he has to stay put, drawing a card instead,
[Flashlight]
.
Michael now has a problem. Defeating
[The Amalgam]
once more would mean luring the
[Deep One Bull]
to our location. It’s probably better to keep it evaded. Three chances at 3 vs 1… First go, is a l followed by a -4 which is still a failure. Second attempt, autofail. Third time lucky… -1, it’s evaded.
Upkeep
[The Amalgam]
engages again with Michael. Mateo draws
[Prescient]
and Michael draws
[Crack Shot]
.
Round 17
Mythos
Mateo draws the final card in the encounter deck,
[Blindsense]
. An agility 3 test that, if failed, would cause
[The Amalgam]
to engage and attack. We could guarantee the success with our l combo, but we could also have Olive soak the attack and use the free engage and our bless combo for a guaranteed evade, leaving us enough actions to move to the
[Idol Chamber]
, trigger the flashback, and get back. That doesn’t seem too bad, so Mateo is going to do the test. He draws a skull, so a failure and gets hit, which Olive takes. Encounter discard gets shuffled, and Michael draws another
[Macabre Memento]
. Looks like
[Robert Castaigne]
is taking this one, but miracles can happen. Not this day. Two horror goes to Robert which takes him out.
Investigators
Mateo will use
[Favor of the Sun]
and
[Ancient Covenant]
one last time to evade
[The Amalgam]
, before dashing back to the
[Idol Chamber]
to use the marble and onyx key to open the door at the far end of the chamber. Doing so reveals two statues which trigger a flashback in a dark dingy basement where some sort cult is performing a ritual. Finally, we get to remove an c from the bag! Considering the amount of pain it’s caused in this scenario, it’s about time. That’s all the objectives complete, which I didn’t expect just a few rounds ago, all that remains is getting to the exit and resigning. Mateo swims back to the underground river, the only piece of dry land remaining.
With
[The Amalgam]
exhausted, Michael is free to move to the exit, but that would leave Mateo to deal with it next round. He also can’t defeat it without pulling in the
[Deep One Bull]
. Both need three actions move to the exit and resign, and with at least one action required to evade
[The Amalgam]
, it seems we can’t quite close this one out next round. The best we can do is draw for cards to commit to the evade, and also get rid of
[Undertow]
. To that end, Michael discards the
[.18 Derringer]
and commits
[Overpower]
, testing 7 vs 3. Pulling a -4, he also pulls himself out of the river and draws
[Crack Shot]
, which doesn’t help with the evade. Drawing again, a
[.45 Automatic]
, and again,
[Remington Model 1858]
.
Upkeep
[The Amalgam]
enages Michael, who draws
[Pilfer]
. Mateo draws
[Radiant Smite]
.
Round 18
Mateo:
[Holy Rosary]
[Rite of Sanctification]
[Flashlight]
[Prescient]
[Radiant Smite]
Michael:
[Crack Shot]
[Crack Shot]
[.45 Automatic]
[Remington Model 1858]
[Pilfer]
Mythos
The mythos provides Mateo with
[Memory of Oblivion]
. We have lots to commit to this, but we discard cards by each point we fail by so it’s net neutral. Mateo pulls -1, so discards
[Rite of Sanctification]
. Michael draws
[Riptide]
, which is absolutely fine. The test fails and he loses
[“Viola” Case]
to the rapids, no harm done.
The end is so close we start to smell the fresh air in anticipation. In the most important evade of Michael’s life, he commits
[Pilfer]
[Remington Model 1858]
[.45 Automatic]
to go +4 against
[The Amalgam]
. Pullling a -3, the abomination is exhausted one final time and Michael dashes to the
[Sealed Exit]
, but can’t yet resign. Mateo follows, but isn’t going to leave his friend behind. One more round and this horrific experience will be behind us.
Upkeep
Mateo draws
[Arcane Studies]
, and Michael draws
[Manual Dexterity]
, both the final cards in their respective decks.
Round 19
Mythos
Three our of four doom, the last round of the scenario. Mateo draws
[Fractured Consciousness]
! Disaster, this could kill Mateo who only has two health remaining. He commits
[Flashlight]
and
[Arcane Studies]
to go +2. With no l in the bag, and on a fully flooded location, Mateo’s chances are slim. Pullling a -1, he makes it through. Michael draws
[From the Depths]
, but it surges.
[Rising Tides]
also surges.
[Memory of Oblivion]
is Michael’s final hurdle, and pulling a v would turn him insane. It’s… a 0. He discards two cards but is otherwise unharmed.
Mateo takes the emerald, four pronged key and unlocks the sewer grate. He steps through into the fresh air and freedom from the nightmare. He then locks the grate behind him and throws the key back through. Michael catches the key and unlocks the grate once more, rejoining his friend on the other side.
It’s over, and not a moment too soon. One more round and the doom clock would have chimed midnight, and Michael would have shuffled his deck, being defeated by horror in the process.
[The Amalgam]
isn’t far behind, and as Mateo and Michael walk away, they hear it slam into the grate behind them, its fleshy appendages thrashing at the bars.
Epilogue
Just before passing out from exhaustion, Mateo and Michael are roused by a black-haired woman they don’t recognise, though she recognises them. Turns out she’s the Elina Harper they were tasked to find in the meeting with Agent Dawson (now part of the abomination they just escaped). After catching up on details and sharing with Harper the extra flashbacks they both experienced, when pressed on remembering how you arrived in Innsmouth, a new flashback is triggered which has Mateo and Michael being driven in Dawson’s car into the cursed down to find Elina, five weeks earlier. Enter Scenario II: The Vanishing of Elina Harper.
Thoughts
Scenario
Wow, that was a wild ride. I won’t pretend we didn’t get very lucky at points, things always seems to be balancing on the precipice, but that’s what Arkham Horror LCG does so well. A singular unlucky pull from the bag at many points near the end could either have resulted in one or both investigator defeats, or the failure to unlock all the flashbacks.
I thoroughly enjoy The Pit of Despair as an opening scenario. It sets up lots of the mechanics that will recurr over the campaign such as the cave locations and engage triggers on the enemies. The encounter sets, especially Rising Tides, are very flavorful and often created tense and thematic situations. Random location placement can often be a problem though, and in this playthrough we saw both sides of that. The placement of
[Underground River]
betwen the final few locations and the exit allowed us an extra few rounds into agenda 3, which ultimately meant the removal of an extra chaos token for the whole campaign which is a huge deal. I’m not sure if there are any balancing mechanics for this later in the campaign, since a poor performance on this scenario could make the rest of the campaign significantly more difficult. However, the
[Underwater Cavern]
were not useful at all, and potentially could have saved multiple move actions which are at a premium when only playing with two investigators.
I think my biggest mistake was not picking up the blue key while on its location. For some reason I thought the key was tied to the free action on
[Idol Chamber]
and couldn’t be taken. It cost Mateo four move actions and caused Michael to spend an extra round juggling enemies.
Investigators
Michael McGlen performed admirably here, considering the amount of enemies there were. His weaknesses are very punishing, and due to the unfortunate draw of
[Paranoia]
, had resource problems for most of the scenario.
[Confiscation]
was unfortunately followed up by enemy draws in the mythos phase which left him on the back foot, and
[Bum’s Rush]
was a useful card to have in these situations. Getting
[Robert Castaigne]
out on the fist round might have been better than the guns, knowing that encounter cards that discard from hand exist. It’s easier to draw another gun than another Castaigne. Michael ended up evading more than expected, but mostly due to
[The Amalgam]
and its interaction with
[Deep One Bull]
. His three agility makes this possible but not easy. I underestimated
[Luger P08]
, it’s a workhorse resource generator for Michael, though probably not a great pick for any other investigator.
Mateo had no trouble with clues,
[Clairvoyance]
putting in work. Two player definitely feels great to play with extra clue gathering, as hoovering up most locations with one action is very powerful. The
[Favor of the Sun]
and
[Ancient Covenant]
combo came into play late but was clutch in closing out the scenario. Unfortunately we drew no good ways to add l to the bag early, and
[Rite of Sanctification]
was as dead draw. It would have helped out a lot with Michael’s resource problems, and helped fund
[Hand of Fate]
to keep the bag topped up. He’s definitely reliant on drawing
[Keep Faith]
early and that didn’t happen this time. I’m not sure about
[Olive McBride]
, she does compliment cards like
[Ward of Radiance]
and
[Prescient]
, but for the most part reduces the chance of success in typical tests. I think replacing with
[Priest of Two Faiths]
 is a solid option (unfortunately we’re blocked from upgrading until after the next scenario).
Comments
Post comment